How Many LED High Bay Lights Do I Need for a Warehouse?
Lighting a big, open warehouse is a real challenge. Facility managers often ask, "How many LED High Bay Lights do I actually need?" The answer depends on ceiling height, floor area, and how bright you want it. This article gives a simple, step-by-step way to find the exact number. Getting this right keeps things safe, efficient, and cost-effective. Many industrial upgrades pay for themselves in 1.5 to 3 years by using less power and needing fewer repairs. By the end, readers can do this math for their own facility, skipping guesswork and getting great lighting.
Key Takeaways
Begin with a simple rule: use one LED high bay light for every 1,000 square feet, then adjust it using a more exact math method.
Match light levels to tasks: use 30-50 foot-candles for general warehouse work, and adjust for specific zones.
To find the total lumens, multiply the area by the target foot-candles. Then divide that number by the fixture lumens, and adjust for light loss.
Pick good LED lights that give off many lumens and last a long time to save energy and need less maintenance.
Adjust the space between lights based on ceiling height and room layout to prevent dark areas and keep lighting even.
Start With a Simple Rule of Thumb
A good way to start is to use one LED high bay light for every 1,000 square feet of warehouse space. This quick guess gives you a rough number for your budget. For a 10,000-square-foot building, the rule says about ten lights. Many facility managers use this number to start talks with lighting suppliers and to set aside money for the project.
The Basic Formula for a Quick Estimate
The rule of thumb turns into a simple math problem. A manager multiplies the warehouse area by the needed lumens per square foot. Then he divides that by the lumen output of each fixture. This basic math does not include ceiling height. For example, a 12,000-square-foot space that needs 30 lumens per square foot requires 360,000 total lumens. Dividing that by a 30,000-lumen fixture gives twelve fixtures.
Ceiling height changes this estimate a lot. For ceilings over 20 feet, the base number of fixtures goes up by a factor of 1.2 to 1.3. This change makes up for the wider light spread and lower brightness at floor level in taller spaces. A warehouse with a 30-foot ceiling would need about 14 to 16 fixtures instead of the first twelve.
Fixture Quantity = (Area × Target Foot-Candles) ÷ (Fixture Lumens × CU × LLF) Where:
Area = floor space (square footage)
Target Foot-Candles = required brightness level
Fixture Lumens = output from each LED high bay light
CU = utilization factor (how much light reaches the work surface)
LLF = light loss factor (accounts for dust, age, and loss of brightness)
Why This Rule Is Just a Starting Point
The rule of thumb gives a rough number, not an exact answer. Real warehouses have shelves, aisles, and equipment that block light and make shadows. The utilization factor and light loss factor in the formula above account for these real-world conditions. Dust buildup, lamp aging, and reflective surfaces all change how much light reaches the floor.
Spacing also matters. A common rule says that the distance between fixtures should be 1.0 to 1.5 times the mounting height. For a 30-foot ceiling, fixtures should be 30 to 45 feet apart. This ratio gives even light and stops dark spots. Following this spacing rule often changes the final fixture count from the first estimate.
The rule of thumb is a planning tool, not a final answer. The following sections go through each variable in detail, so a manager can find the exact number of LED high bay lights needed for a specific warehouse layout.
Step 1: Determine Required Illuminance
Before anyone can figure out how many LED high bay lights they need, they must first decide how bright the warehouse should be. This brightness level, called illuminance, measures the light that reaches a surface. Two units are used for this: foot-candles and lux. A foot-candle is the light from one candle one foot away. Lux works the same way but from one meter away. One foot-candle equals about 10.8 lux. Most American lighting experts use foot-candles, while European standards use lux.
Matching Light Levels to Warehouse Activities
The Illuminating Engineering Society (IES) gives recommended light levels for different warehouse tasks. These recommendations change based on how precise the work is. In storage areas where workers rarely go, only 5 to 10 foot-candles are needed. Active storage with big items needs 10 to 20 foot-candles. Normal picking and packing requires about 20 foot-candles. Fine item picking needs 20 to 50 foot-candles.
Loading docks and shipping areas need more light, usually 30 to 50 foot-candles, because workers move fast and handle many packages. High-rack storage areas need 15 to 30 foot-candles so workers can read labels and find products. Office and admin spaces inside the warehouse should have 30 to 50 foot-candles for comfortable paperwork and computer work.
Using Foot-Candles or Lux Standards
The table below shows IES recommendations for common warehouse zones:
Warehouse Zone | IES Recommended Illuminance (fc) |
|---|---|
General Storage & Picking | 10 - 30 |
Loading Docks & Shipping | 30 - 50 |
High-Rack Storage | 15 - 30 |
Fine Detail Work | 50 - 100 |
Office/Administrative | 30 - 50 |
For most general warehouse work, a target of 30 to 50 foot-candles (about 320 to 540 lux) works well. This range gives enough brightness for safe movement and accurate order picking without wasting energy. Detailed inspection areas, where workers look at products closely, may need 100 to 200 foot-candles (1,080 to 2,150 lux). A common suggestion for most facilities is at least 500 lux, with 800 lux being best for comfortable, productive work.
Warehouse managers should pick their target light level based on the main tasks in each area. A facility that mostly stores pallets can use lower levels, while a distribution center with constant picking needs brighter conditions. Picking the right target now prevents under-lighting that causes mistakes or over-lighting that wastes electricity.
Step 2: Calculate Total Lumens Needed
Once a manager picks the target brightness, the next step is simple math. The formula for total lumens is easy: Total Lumens = Area (sq ft) × Illuminance (foot-candles). This gives the raw light needed at the work surface, usually the floor or where workers do their jobs.
Total Required Lumens = Floor Area × Target Illuminance
For example, a 5,000-square-foot warehouse aiming for 30 foot-candles needs 150,000 lumens. A smaller 1,200-square-foot workshop targeting 40 foot-candles needs 48,000 lumens. These numbers show the light that must reach the work surface, not the full output of the fixtures.
The Simple Math: Area Times Illuminance
The math works the same for any space. A manager multiplies the square footage by the suggested foot-candle level for the task. Here are some real examples:
A 5,000 sq ft warehouse aiming for 30 foot-candles → 5,000 × 30 = 150,000 lumens
A 1,200 sq ft workshop aiming for 40 foot-candles → 1,200 × 40 = 48,000 lumens
A 576 sq ft garage aiming for 30 foot-candles → 576 × 30 = 17,280 lumens
This math gives the starting point. But this number is the light at the work surface after all losses. The fixtures must put out more light than this because some light gets absorbed, blocked, or lost before it hits the floor.
Accounting for Light Loss and Maintenance Factors
Real-world conditions cut the light that reaches the work surface. Dust builds up on fixtures, LED chips get dimmer over time, and reflective surfaces wear out. These factors combine into a maintenance factor, usually between 0.7 and 0.8 for clean warehouses. Dusty places see even lower factors.
Typical warehouse light loss factor: 0.60 - 0.70 for dusty or dirty conditions
A manager divides the baseline lumens by the maintenance factor to find the true fixture output needed. For a warehouse needing 150,000 lumens with a 0.7 maintenance factor, the math is 150,000 ÷ 0.7 = 214,286 lumens. This bigger number covers the losses over the fixture's life. Skipping this step leads to dark spaces that cause safety risks and picking mistakes.
Step 3: Select the Right LED High Bay Lights
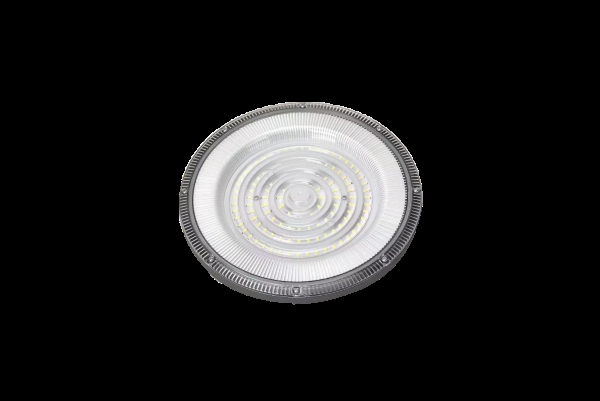
Picking the right fixture is just as important as doing the math. A bad light will fail early or make uneven brightness. A good unit works well for years. This part explains what to look for and why the LED UFO High Bay Light from Liyin Lighting is a solid option.
Understanding Fixture Lumen Output and Wattage
Many buyers look at wattage first. That is the wrong focus. Lumens show the total visible light a fixture gives off. Wattage shows how much energy it uses. A high-wattage light with bad optics can give less useful light than a lower-wattage unit with better design. The goal is to match lumen output to the ceiling height and the target brightness from Step 1.
Ceiling Height | Ideal Lumen Output |
|---|---|
20-30 feet | 22,000-35,000 lumens |
31-40 feet | 35,000-47,000 lumens |
40+ feet | 47,000+ lumens |
Beam angle matters too. A wide beam angle of 90 to 120 degrees works for ceilings between 15 and 20 feet. It spreads light evenly over a big area. For ceilings above 25 feet, a narrower beam points light straight down. This cuts wasted light and makes the floor easier to see.
Mounting height also changes coverage. Putting a fixture too high lowers the light that hits the floor. Putting it too low creates glare that hurts workers' eyes. Matching the fixture's power to the mounting height avoids both issues.
Energy efficiency is also important. LED tech uses much less power than old lighting. The chart below shows the wattage difference for the same light output:
LED High Bay Light (W) | Metal Halide High Bay Light (W) |
|---|---|
30-80W | 150W |
90-150W | 250W |
180-200W | 400W |
250W | 600W |
This chart shows a 50 to 60 percent drop in wattage for the same brightness. Over a year of steady use, that difference adds up to big energy savings.
Choosing a Quality Fixture From a Trusted Brand
The LED UFO High Bay Light from Liyin Lighting has the features that count. The company is a top maker in Guangdong, China. Their product line includes the APL-UFO-06, APL-UFO-05, and APL-UFO-02 models. Each unit gives high lumen output with great color rendering for clear sight in large spaces.
Heat control is a key design feature. The aerodynamic shape pulls heat away from the LED chips. This keeps the fixture cool and makes it last longer. A good LED fixture keeps 70 percent of its starting light output for 100,000 hours or more. Metal halide fixtures usually last only 12,000 to 20,000 hours. An LED light running 12 hours a day can last over 11 years. A metal halide light under the same conditions needs a new bulb every 4 years.
Durability is key in warehouses. The strong build resists dust, moisture, and impact. The high IP rating protects inner parts from tough conditions. This reliability cuts maintenance costs and downtime.
Installation is simple. Several mounting options fit different ceiling heights and setups. Workers can mount the fixture fast without special tools.
Liyin Lighting also offers quick customer support. Their team answers quote requests within 12 hours. This service helps facility managers move ahead with confidence.
For warehouses that need reliable LED High Bay Lights, this product line is a cost-effective choice. The mix of efficiency, long life, and toughness makes it a smart buy for any industrial space.
Step 4: Divide to Find Initial Fixture Count
After you finish the total lumen calculation and pick a fixture, the next step is simple division. A manager divides the total lumens needed by the lumen output of each chosen fixture. This math gives the starting number of LED High Bay Lights for the warehouse.
The Calculation and a Practical Example
The formula is easy to follow. Number of Fixtures equals Total Lumens Needed divided by Lumen Output per Fixture. This step turns the work from Step 2 and Step 3 into one useful number.
Let's use the warehouse from the earlier example. The total lumens needed after applying the maintenance factor is 214,286 lumens. A manager picks a fixture that gives 20,000 lumens. The math is 214,286 divided by 20,000. That equals 10.7 fixtures.
A simpler example shows the idea clearly. A facility needs 100,000 lumens. Each fixture gives 20,000 lumens. The math gives 5 fixtures exactly. No rounding is needed. Real-world cases almost always give a decimal. The manager must decide how to handle the leftover part.
The decimal result tells the manager that the exact number sits between two whole numbers. Ten fixtures give 200,000 lumens. That is less than the 214,286 needed. Eleven fixtures give 220,000 lumens. That is more than the requirement. The choice between ten and eleven depends on the budget, the layout, and the safety margin you want.
A manager should also check the fixture's beam angle and mounting height. A fixture with a narrow beam angle may need closer spacing. That situation could raise the final count above the first division number. The first count from this step is a minimum. It is not the final answer.
Rounding Up and Planning for Redundancy
Rounding up is the standard practice for lighting math. A manager should always round up to the next whole number. Ten fixtures cannot cover the 214,286 lumen need. Eleven fixtures can. Taking ten fixtures would leave the space underlit by about 14,000 lumens. That gap creates dark spots. Dark spots lower safety and productivity.
Rounding up also gives a buffer against real-world conditions. The maintenance factor already covers dust and aging. But extra margin helps. The extra light from the eleventh fixture covers future losses as the LEDs get older. It also helps if the actual layout needs more fixtures than the math suggests.
Redundancy planning takes this idea further. A manager might add one extra fixture for every ten to fifteen needed. This practice keeps the warehouse well lit if one fixture fails. In a critical operation, losing one fixture should not create a safety risk. The extra fixture gives backup coverage.
The extra fixture also helps with maintenance. When a fixture needs replacement or cleaning, the lights in that area stay bright enough for work. The facility does not need to stop operations for maintenance. This approach cuts downtime and keeps the warehouse productive.
Budget limits sometimes stop extra fixtures. In that case, the manager should at least round up to the next whole number. The first count from the division gives a minimum. The final count should be higher, not lower. A warehouse with good lighting sees fewer mistakes, better safety, and happier workers.
The next step involves adjusting the fixture count based on spacing needs. The first count from this step is a starting point. The spacing math in Step 5 will fine-tune the number further.
Step 5: Adjust Spacing for LED High Bay Lights
The initial fixture count from Step 4 gives a starting number. The actual layout depends on spacing. Poor spacing creates dark spots or wasted light. The spacing-to-mounting-height ratio solves this problem. This ratio tells a manager how far apart to place each fixture for even coverage.
The Spacing-to-Mounting-Height Ratio
The spacing-to-mounting-height ratio compares the distance between fixtures to the height of the ceiling. Most LED High Bay Lights work best with a ratio between 1:1 and 1.5:1. A 1:1 ratio means the spacing equals the mounting height. A 1.5:1 ratio means the spacing is one and a half times the mounting height.
For a warehouse with a 30-foot ceiling, the spacing should be 30 to 45 feet between fixtures. A 20-foot ceiling needs spacing of 20 to 30 feet. This range gives the installer flexibility to adjust for the building layout and the fixture's beam angle.
A fixture with a wider beam angle of 120 degrees can use a wider spacing ratio. A fixture with a narrower beam angle of 90 degrees needs a tighter spacing. The product specifications from the manufacturer usually list the recommended spacing for different ceiling heights.
Avoiding Dark Spots and Overlapping Light
Dark spots happen when fixtures are too far apart. These areas receive less light than the target level. Workers in those spots struggle to see labels and move safely. Overlapping light happens when fixtures are too close together. This wastes energy and creates uneven brightness that can cause glare.
The goal is uniform illumination. Uniform illumination means the light level across the floor stays within a narrow range. The spacing ratio helps achieve this. A manager can use the ratio to create a grid pattern on the warehouse floor. Each fixture covers its own area, and the light from neighboring fixtures overlaps slightly.
The overlap is important. A small overlap of 10 to 20 percent prevents dark spots between fixtures. Without this overlap, the areas between fixtures receive less light. The spacing ratio ensures this overlap happens naturally for LED High Bay Lights. The result is a well-lit warehouse with no dark corners and no wasted energy.
A manager should also consider the shape of the warehouse. A rectangular space may need different spacing in the length and width directions. The spacing ratio provides a starting point. The final layout should match the building's dimensions and the position of racking systems.
Step 6: Consider Warehouse Layout
The Impact of Racking and Storage Systems
Tall racks change how light moves through a warehouse. They block light and make shadows that lower visibility in aisles and on lower shelves. A manager must think about these blocks when placing lights. The spacing grid from Step 5 works best when it matches the real rack setup.
Racks that are 25 to 30 feet tall cast long shadows on the floor. Light from fixtures above the racks cannot reach the aisles between them. So the manager must put fixtures right over the aisles, not over the racks. This change alters the number of fixtures from the first count.
A good way to start is to draw the rack layout on paper. The manager marks each aisle and notes where light must hit the floor. Then fixtures line up with those spots. This way, workers see clearly when moving between racks and reading labels on lower shelves.
Dealing With Obstructions and Reflectance
The surfaces inside a warehouse affect how much light reaches the floor. Lighter ceilings and walls bounce light back into the space, raising overall brightness and making light more even across the floor. This bounced light cuts the number of fixtures needed because each one adds more useful light.
Dark surfaces soak up light instead of bouncing it. This lowers the useful light and forces the use of more or brighter fixtures to get the same evenness. The result is higher cost and more energy use. A warehouse with dark walls or a dark ceiling will need more fixtures than one with light surfaces.
A manager can check how much light walls and ceilings bounce back before settling on the fixture count. Light-colored concrete or white paint reflects well. Dark metal or plain concrete soaks up more light. The maintenance factor from Step 2 already covers some of this loss, but a manager should adjust it for extreme cases.
The layout of doors and loading bays also matters. Big openings let in daylight, which can help the LED lights. But these openings also let in heat and dust, which changes the light loss factor over time. A manager should look at the whole setting before making the final light choice.
A Worked Example: 10,000 Sq Ft Warehouse
Applying All the Steps in a Real-World Scenario
A manager with a 10,000-square-foot warehouse and a 20-foot ceiling can follow the steps in order. The first decision involves the target brightness. For general storage and picking work, 50 foot-candles provides a comfortable, safe level. This target equals roughly 540 lux.
The total lumen calculation multiplies the floor area by the illuminance target. The math works as follows: 10,000 square feet times 50 foot-candles equals 500,000 lumens. This number represents the light that must reach the work surface after all losses.
The maintenance factor adjusts this figure upward. Using a factor of 0.7 for a typical warehouse environment, the manager divides 500,000 by 0.7. This calculation yields approximately 714,286 lumens needed from the fixtures themselves.
Selecting a fixture with 20,000 lumens output gives the initial count. Dividing 714,286 by 20,000 equals 35.7 fixtures. Rounding up to the next whole number gives 36 fixtures as the starting point.
Spacing adjustments refine this number. For a 20-foot ceiling, the spacing-to-height ratio should fall between 1.0 and 1.5. Using the IESNA guideline of 0.6 times ceiling height for lower ceilings, the spacing works out to 12 feet between fixtures. This tight spacing means the 36 fixtures spread evenly across the 10,000-square-foot floor.
The fundamental scaling formula for any warehouse size follows this pattern:
Total Wattage = (Warehouse Area × Target Illuminance) / (Luminous Efficacy × Utilization Factor × Maintenance Factor)
A manager changing the warehouse area only needs to adjust that single term while keeping other factors constant or modifying them for specific conditions. Higher racking reduces the utilization factor, for instance.
Comparing Different Fixture Options
The beam angle of each fixture affects how the light spreads across the floor. A 20-foot ceiling falls into the 6-to-9-meter range, where both 90-degree and 120-degree beam angles work well. The table below shows the options:
Beam Angle | Effect on Uniformity | Suitable Mounting Height |
|---|---|---|
Narrow (45°) | Concentrates light, causes severe glare and uneven lighting at low heights | Never at 6–8 m |
Wide (120°) | Spreads light broadly but reduces ground illuminance; insufficient at high heights | Not at 12–15 m+ |
Medium (60°–90°) | Balances coverage and intensity; recommended for mid-to-high heights | 9–12 m (90°), 10–15 m (60°) |
For the 20-foot ceiling in this example, a 90-degree beam angle provides balanced coverage. The UFO-style fixture from Liyin Lighting with this beam angle spreads light evenly without creating hot spots or dark patches. The final layout places 36 fixtures in a grid pattern, with each unit covering roughly 278 square feet. This arrangement delivers uniform illumination across the entire warehouse floor.
Calculating the right number of LED High Bay Lights follows a clear path. A manager determines the target illuminance, multiplies the floor area, selects a quality fixture, divides for the initial count, then adjusts for spacing and layout. Each step builds on the last.
Taking time with this process pays off. A well-lit warehouse operates safely and productively. The energy savings also matter. A 120W LED fixture uses roughly 70% less power than a 400W metal halide unit over 10,000 hours. LEDs also last over 50,000 hours, compared to about 15,000 for metal halide.
Metric | 400W Metal Halide | 120W LED |
|---|---|---|
Power consumption over 10,000 hours | 4,000 kWh | 1,200 kWh |
Energy cost savings | Baseline | ~70% reduction |
Average lifespan | ~15,000 hours | 50,000+ hours |
Replacement interval (12 hrs/day) | ~4 years | ~11 years |
Applying these steps to any facility yields the right fixture count. Consulting a lighting expert or exploring reliable product options, such as the LED UFO High Bay Light from Liyin Lighting, ensures professional guidance and high-performance results.
FAQ
How much energy can LED high bay lights save compared to older fixtures?
LED lights use about 50 to 60 percent less power than metal halide lights for the same brightness. A 120W LED can replace a 400W metal halide light. Over 10,000 hours, that cuts the electricity used by about 70 percent.
Can LED high bay lights work with dimming controls?
Yes. Many LED high bay lights work with dimming systems like 0-10V or DALI. This lets managers change the brightness based on how many people are in the space or how much daylight comes in. Dimming saves even more energy and makes the lights last longer.
How long do LED high bay lights typically last?
Good LED high bay lights keep 70 percent of their original brightness for 50,000 hours or more. If they run 12 hours a day, that is about 11 years. Metal halide lights need to be replaced every 4 years under the same conditions.
What factors affect the payback period for a lighting upgrade?
The payback time depends on energy prices, how many hours the lights run, and how many lights are replaced. Most industrial LED upgrades pay for themselves within 1.5 to 3 years through lower electricity bills and less maintenance. Higher energy prices make the payback even faster.