How to choose the right recessed downlight for your space
A poor selection for indoor lighting often leads to an unsatisfying lighting design.
A recent study indicates that nearly 70% of homeowners are dissatisfied with their home lighting results.
The right recessed lighting transforms any home. This recessed lighting shopping guide explains how to choose recessed lighting for any indoor room. To choose right recessed downlight, one must match the downlights to function. Understanding four factors is key: Purpose, Size, Quality, and Trim. This knowledge simplifies comparing a recessed downlight, LED DownLight, and other led light fixtures from various led light manufacturers or a specific LED DownLight Manufacturer.
Step 1: Define Your Lighting's Purpose
Before selecting a fixture, one must first define the goal of the light itself. A successful indoor lighting plan layers three distinct types of illumination to create a space that is both functional and atmospheric. Each layer serves a unique purpose, and understanding them is the foundation of a great lighting design.
General (Ambient) Lighting
Creating Overall Room Illumination
General lighting, also known as ambient light, provides the primary, uniform illumination for an entire room. Its main function is to ensure safe navigation and create a comfortable level of brightness. This is the base layer of light upon which all other layers are built. Effective general lighting eliminates dark corners and makes a space feel welcoming and open.
Best Practices for Spacing
Proper spacing is crucial for even coverage. A common question is about deciding how many recessed lights you need for a space. Professionals use several methods to calculate this.
Pro Tip: A reliable starting point for spacing recessed lights is to divide the ceiling height by two. For an 8-foot ceiling, space your lights approximately 4 feet apart. The distance from the wall should be half this value, or 2 feet.
For a more precise layout, experts often use a lumen-based calculation:
Determine Target Lux: Identify the desired brightness for the room (e.g., a kitchen needs more light than a living room).
Calculate Total Lumens: Multiply the room's square footage by the target lux level.
Divide by Fixture Output: Divide the total required lumens by the lumen output of a single downlight to find the total number of fixtures needed.
Task Lighting
Focusing Light on Work Areas
Task lighting delivers concentrated, brighter light to specific areas where activities like cooking, reading, or working occur. This focused illumination reduces eye strain and improves safety and precision. Unlike general lighting that fills a space, task lighting targets a surface.
Common Task Lighting Locations
Proper placement is essential for effective task lighting. To avoid creating shadows, the light source should come from in front of the user, not directly above or behind them. Key locations in a home include:
Kitchen Counters: Position recessed lighting in the ceiling so they are centered over the edge of the countertop. This illuminates the workspace without casting a shadow from the person standing there.
Home Office Desks: Place a light slightly in front of where a person sits to light up the desk surface and keyboard.
Reading Nooks: An adjustable recessed light aimed at the book pages provides excellent focused light.
Accent Lighting
Highlighting Art and Architecture
Accent lighting adds drama and visual interest to a home by drawing attention to specific features. This type of indoor lighting is used to spotlight artwork, sculptures, textured walls, or unique architectural details. The key is precision. For the best effect, aim the center of the light beam at the object. Adjustable recessed lighting offers the flexibility needed to achieve the perfect 30-degree angle, which minimizes glare on framed art.
The 3:1 Brightness Rule
A professional lighting design principle for accent lighting is the 3:1 brightness ratio. This rule states that the highlighted feature should be approximately three times brighter than the surrounding ambient light. This contrast creates a distinct focal point without appearing harsh or theatrical. When highlighting sensitive materials, always consider fixtures with high color rendering and low UV output to balance presentation with preservation.
Wall Washing and Grazing
Beyond simple accent lighting, wall washing and grazing are advanced techniques that use light to transform entire vertical surfaces. These methods turn a plain wall into a dynamic feature, adding depth, sophistication, and character to a room. A well-executed wash or graze is a hallmark of a professional lighting design, demonstrating a nuanced understanding of how light interacts with architecture.
Creating a Dramatic Effect
Both techniques create drama by manipulating shadows and highlights across a wall. Instead of a small pool of light on a piece of art, the entire wall becomes the canvas. Wall washing can make a small room feel larger and more open by evenly illuminating its boundaries. Wall grazing, conversely, introduces a powerful sense of texture and visual interest, turning a simple brick or stone wall into a dramatic focal point. These effects add a layer of luxury and intentionality to a space that general lighting alone cannot achieve.
Differentiating Wash vs. Graze
While both techniques illuminate walls, their goals and methods are distinct. The choice between them depends entirely on the surface material and the desired outcome.
Wall Washing: This technique creates a smooth, uniform blanket of light. It minimizes surface imperfections and produces a bright, clean look. The goal is to eliminate shadows and make the wall appear flawless and expansive. For an effective wall washing effect, the fixture should be offset from the vertical surface at a ratio of 1:6 to 1:8 the height of the surface being illuminated. This wider spacing allows the light beams to overlap and blend seamlessly.
Wall Grazing: This technique does the opposite; it aims to enhance and exaggerate surface texture. It creates dramatic shadows by casting light at a steep angle. To achieve a wall grazing effect, downlights should be placed approximately 6 to 12 inches back from the wall. This close placement is ideal for highlighting interesting materials like stone, brick, wood panels, or textured wallpaper.
A successful lighting design depends on selecting the right technique for the right surface.
Quick Comparison: Wash vs. Graze
Feature
Wall Washing
Wall Grazing
Primary Goal
Create a smooth, even appearance
Emphasize and reveal texture
Light Effect
Hides imperfections, feels expansive
Creates dramatic shadows and highlights
Placement
Farther from the wall (e.g., 2-3 ft)
Very close to the wall (6-12 inches)
Best For
Smooth, painted drywall; making rooms feel larger
Stone, brick, wood, textured panels
Step 2: How to Choose Recessed Lighting Size for Your Ceiling
After defining the purpose of the illumination, the next step in how to choose recessed lighting involves selecting the appropriate fixture size. The size of a downlight significantly impacts the aesthetic and functional outcome of a lighting design. Determining the right size for recessed lighting is not just about what fits in the ceiling; it is about matching the scale of the light to the room and its intended function.
Understanding Downlight Sizing
Navigating the world of recessed lighting sizes can seem confusing, but it simplifies once one understands two key concepts: how size is measured and its relationship to brightness.
How Aperture Size is Measured
The "size" of a recessed downlight refers to the diameter of its aperture—the opening where light comes out. It does not refer to the overall diameter of the trim or the housing. Common residential sizes range from 2 inches to 6 inches.
Note: A 4-inch recessed light has a 4-inch opening. The visible trim ring around it will be larger, perhaps 4.5 to 5 inches in diameter. Always refer to the aperture size for accurate comparisons.
Does Size Affect Brightness?
A larger aperture does not automatically mean a brighter light. Brightness is measured in lumens, not inches. Advances in LED technology allow smaller fixtures to produce a high lumen output. A 3-inch fixture can be just as bright as, or even brighter than, an older 6-inch model. The key is to check the lumen specification of the fixture, not just its physical size.
Small Recessed Lights (2-3 Inch)
Small-aperture recessed lights have become a hallmark of contemporary interior design, offering powerful performance in a discreet package.
For a Modern, Minimalist Look
Fixtures with 2-inch and 3-inch apertures create a clean, minimalist ceiling line. Their small size makes them less obtrusive, allowing the architecture and interior decor to take center stage. This "less is more" approach results in a sophisticated and modern aesthetic, where the light effect is more prominent than the light source itself. They are an excellent choice for any home seeking an updated and refined indoor atmosphere.
Ideal for Accent and Precise Task Lighting
The compact nature of small recessed lights makes them perfect for targeted illumination. Their focused beams are ideal for creating dramatic accent lighting on artwork or architectural features. They also excel at providing precise task lighting over smaller surfaces like reading nooks or kitchen prep zones. The lumen output for these smaller fixtures can vary significantly, making it crucial to match the fixture to the specific application.
Typical Applications (Residential) | Lumen Output Range | |
|---|---|---|
2-inch LED | Adjustable Downlight & Wall Wash, Ultra-Shallow Fixed | 850 - 1500 lumens |
3-inch LED (VERSE) | Fixed Downlight and Wall Wash, Remodel Fixed, Sloped Ceiling | 750 - 950 lumens |
3-inch LED (ELEMENT) | Adjustable, Fixed, Wall Wash, Shallow & Ultra-Shallow Models | 600 - 1800 lumens |
3-inch LED (ENTRA CL) | Adjustable, Fixed & Wall Wash for IC & Remodel applications | 530 - 1300 lumens |
As the data shows, different models within the same size category offer a wide range of brightness levels, reinforcing that one must check the lumen specification for the intended purpose.
Medium Recessed Lights (4 Inch)
The 4-inch recessed light has emerged as the go-to choice for designers and homeowners who need a single fixture to perform multiple roles within a space.
The Versatile All-Rounder
A 4-inch downlight strikes an ideal balance between the discreet appearance of smaller lights and the broad coverage of larger ones. Its moderate size allows it to blend seamlessly into most ceilings without appearing too small or too bulky. This versatility makes it a popular and safe choice for a wide range of indoor applications, from new construction to home renovations.
Balancing General and Task Needs
The primary strength of the 4-inch fixture is its ability to bridge the gap between general and task lighting. A grid of 4-inch lights can provide excellent ambient illumination for an entire room. At the same time, individual fixtures are effective for focused tasks. This adaptability is why they are frequently used in multi-functional spaces.
Living Rooms: Homeowners use them to create uniform general lighting, with dimmers to adjust the ambiance for different activities.
Kitchens: They are commonly placed over countertops and islands to provide bright, effective task illumination for food preparation.
Bathrooms: Their clean, modern look offers sufficient light for grooming tasks while contributing to a spa-like feel.
Office Spaces: In both commercial and home offices, they offer flexible solutions that support concentration and visual comfort.
This adaptability makes the 4-inch fixture a cornerstone of modern lighting design, capable of meeting diverse needs within a single, cohesive plan.
Large Recessed Lights (5-6 Inch)
For decades, 5-inch and 6-inch recessed lights were the undisputed workhorses of residential lighting. While smaller apertures have gained popularity for modern aesthetics, these larger fixtures remain a powerful and practical choice for specific applications, particularly for illuminating large, open areas.
The Standard for General Lighting
Historically, 5-inch and 6-inch fixtures have been the go-to solution for providing broad, ambient illumination. Their larger apertures typically produce a wide beam of light that can cover a significant area, reducing the total number of fixtures needed to light a room. This makes them an efficient and cost-effective option for general lighting in spaces like great rooms, basements, and open-concept living areas. The primary goal with these larger recessed lights is to create a comfortable, uniform layer of light.
The lumen output for these models varies, allowing for customization based on room size and brightness requirements.
Model | Delivered Lumens | Beam Spread |
|---|---|---|
REFLECTIONS 5" | 684 - 1989 | General Illumination |
LOTUS 5" LED | 550 - 1400 | General Illumination |
LOTUS 7" LED | 550 - 1400 | General Illumination |
LOTUS 9" LED | 550 - 1400 | General Illumination |
LOTUS 12" LED | 550 - 1400 | General Illumination |
As shown, even within the larger size categories, a wide range of lumen packages is available to suit different general lighting needs.
Best for High Ceilings
The true strength of 5-inch and 6-inch recessed lighting lies in its performance with high ceilings. In rooms with ceilings of 10 feet or more, light has a longer distance to travel to reach the floor and functional surfaces. Smaller fixtures can struggle to deliver adequate illumination from such heights, resulting in dim, shadowy spaces. Larger fixtures, often equipped with higher lumen outputs and wider beam angles, effectively push light down into the living area, ensuring bright and even coverage. Their scale also appears more architecturally appropriate in voluminous rooms, preventing the fixtures from looking undersized or lost in a vast ceiling plane.
How Ceiling Height Impacts Size Choice
Ceiling height is a critical factor in determining the right size for recessed lighting. The distance between the fixture and the floor directly affects how light spreads and its intensity at eye level and on work surfaces. A successful lighting plan always accounts for this vertical dimension.
Guidelines for 8-9 Foot Ceilings
Standard 8-foot to 9-foot ceilings offer the most flexibility in fixture selection. This height is common in most modern homes.
Small (2-4 inch) Lights: These are excellent for this ceiling height. They provide a modern look and can be used for general, task, and accent lighting. For general lighting, a spacing of 4 to 6 feet apart is a common rule.
Large (5-6 inch) Lights: While still usable, larger fixtures can sometimes feel visually heavy or dated in a standard-height ceiling. If used, they should be spaced farther apart to avoid creating overly bright "hot spots."
Pro Tip: For ceilings between 2.4m and 2.8m (approximately 8 to 9 feet), a good starting point is to space downlights 1.2m to 1.4m (about 4 to 4.5 feet) apart. This ensures the cones of light overlap properly for even coverage.
Adjusting for 10+ Foot Ceilings
Higher ceilings demand a different strategy to ensure light effectively reaches the living space. As ceiling height increases, the light from a fixture spreads wider but becomes less intense.
Adjustments are necessary to compensate. Higher ceilings may necessitate more powerful downlights or closer spacing to maintain adequate brightness at floor level.
Here are key considerations for ceilings 10 feet and higher:
Increase Lumen Output: Select fixtures with a higher lumen package. A light that is perfect for an 8-foot ceiling will feel dim in a 12-foot ceiling. One must calculate the total lumens needed for the room and choose fixtures powerful enough to meet that target from a greater height.
Choose Appropriate Size: 4-inch to 6-inch fixtures are generally better suited for high ceilings. Their larger scale is more proportional to the room's volume, and they often offer the higher lumen packages required.
Adjust Spacing: While high-output, wide-beam lights might allow for wider spacing, a common approach is to maintain or slightly reduce spacing to ensure strong, overlapping coverage. For ceilings above 2.8m (9+ feet), spacing of 1.5m to 1.8m (5 to 6 feet) is often recommended, but this depends heavily on the fixture's specific beam angle and lumen output.
Step 3: Select the Correct Light Quality for Mood and Clarity
Once a homeowner determines the purpose and size of their recessed lights, the next critical decision involves light quality. This is not about the fixture's construction but the characteristics of the light it emits. Light quality is a combination of color temperature (Kelvin), color rendering (CRI), and brightness (lumens). A careful selection of these attributes is essential for creating a space that is not only well-lit but also feels comfortable and visually accurate. This step transforms a functional lighting plan into an exceptional lighting design.
Understanding Color Temperature (Kelvin)
Color temperature is one of the most influential factors in setting the mood of a space. It dictates whether a room feels warm and inviting or cool and energizing.
What is Kelvin (K)?
Kelvin (K) is the unit of measurement for Correlated Color Temperature (CCT). It describes the color appearance of a white light source, ranging from warm (amber) to cool (bluish). A common misconception is that "warm" light is physically hotter; in reality, lower Kelvin numbers represent warmer colors, while higher Kelvin numbers represent cooler colors.
A Quick Guide to Kelvin:
< 2000K: Emits a dim, candle-like glow.
2000K to 3000K: Produces a warm, calming white light similar to an incandescent bulb.
3100K to 4500K: Gives off a bright, neutral white light.
4600K to 6500K: Casts a crisp, blue-toned light similar to daylight.
How Kelvin Affects Room Atmosphere
The color of light has a direct physiological and psychological impact on people. Scientific studies confirm that different color temperatures can influence mood, alertness, and even the body's natural sleep-wake cycle, known as the circadian rhythm. A 2018 study in Physiology & Behavior found that the color temperature of morning light significantly influences alertness levels.
Cool, blue-enriched light signals "daytime" to the brain, boosting serotonin and concentration. Conversely, warm, low-level light helps the body prepare for rest by allowing melatonin levels to rise. This makes the choice of Kelvin a crucial part of any indoor lighting strategy.
Choosing Your Color Temperature
Matching the Kelvin temperature to the room's function is a cornerstone of professional lighting design. The right choice enhances both the usability and the ambiance of the space.
Warm White (2700K-3000K) for Cozy Spaces
Warm white light creates a calming, relaxing atmosphere. It evokes feelings of comfort and safety, making spaces feel intimate and inviting. This temperature range is ideal for areas of relaxation in the home.
Living Rooms: Encourages a comfortable environment for socializing and unwinding.
Bedrooms: Promotes relaxation before sleep by signaling to the brain that it is time to wind down.
Dining Rooms: Creates an intimate and appealing ambiance for meals.
Neutral White (3500K) for Balanced Light
Neutral white light provides a clean and efficient look without being too harsh or sterile. It offers a balance between the warmth of 2700K and the coolness of 4000K, supporting focus and alertness without overstimulation. This makes it a versatile choice for multi-purpose areas.
Kitchens: Renders food colors accurately and provides clear light for meal preparation.
Home Offices: Supports concentration and visual comfort for work-related tasks.
Bathrooms: Offers clean, flattering light for grooming tasks.
Cool White (4000K-5000K) for Functional Areas
Cool white light is invigorating and stimulating, enhancing clarity and focus. Its crisp, bright nature is excellent for task-oriented environments where high visibility is paramount. However, homeowners should use it thoughtfully, as evening exposure to cool light can disrupt sleep patterns.
Garages & Workshops: Provides maximum visibility for detailed projects and safety.
Utility Rooms: Ensures clear sightlines for chores like laundry.
Commercial Spaces: Often used in workplaces to reduce eye strain and boost productivity.
Color Temperature | Psychological Effect | Best For |
|---|---|---|
Warm White (2700K–3000K) | Relaxing, cozy, comfortable | Living rooms, bedrooms, dining areas |
Neutral White (3500K) | Balanced, focused, clean | Kitchens, bathrooms, home offices |
Cool White (4000K–5000K) | Alert, energetic, crisp | Garages, workshops, utility spaces |
Why Color Rendering Index (CRI) Matters
Beyond color temperature, the Color Rendering Index (CRI) determines how accurately a light source reveals the true colors of objects. It is a critical measure of light quality that directly impacts visual comfort and the aesthetic appeal of an interior.
What is CRI?
CRI is a scale from 0 to 100 that measures the ability of a light source to render colors faithfully compared to a natural light source. A light with a high CRI will make colors appear vibrant and true, while a light with a low CRI can make them look dull, washed out, or even shift their hue. The technical difference lies in the light's spectral power distribution. High CRI lights have a full, balanced spectrum, while low CRI lights have an uneven, "spiky" spectrum with gaps in certain colors. This is why some older fluorescent or early LED lights made a room feel sterile or unnatural. The selection of a high-value downlight often involves considering both its CRI and its energy efficiency.
Why CRI 90+ is the Gold Standard for Homes
For residential applications, a CRI of 90 or higher is considered the gold standard. While a CRI of 80 is acceptable for some applications, the jump to CRI 90+ provides a significant and noticeable improvement in lighting performance. This is especially true for rendering deep reds, a color that low-CRI lights struggle with. The specific score for red rendering, known as R9, is a key differentiator.
Here is how a high CRI improves an indoor environment:
Accurate Skin Tones: People look healthier and more natural.
Vibrant Decor: The true colors of furniture, artwork, and paint are revealed.
Appealing Food: Fresh produce and prepared meals look more appetizing.
Investing in high-quality products with a CRI of 90+ ensures that a home looks its absolute best. The best led downlights today offer excellent color rendering, often with dimmable capabilities and high light efficiency, delivering superior performance without a major sacrifice in energy efficiency.
Decoding Lumens for Perfect Brightness
After establishing color temperature and rendering, the final element of light quality is brightness. Brightness is measured in lumens, and getting this value right is crucial for ensuring a room is both comfortable and functional.
What are Lumens?
Lumens (lm) are the standard unit of measurement for the total amount of visible light emitted by a source. In the past, consumers associated brightness with wattage, but watts measure energy consumption, not light output. The rise of energy-efficient LED technology made this association obsolete.
Lumens vs. Watts: Lumens measure brightness, while watts measure the energy used to produce that brightness. A modern LED bulb can produce the same number of lumens as an old incandescent bulb while using a fraction of the wattage. Always compare lumens to determine a fixture's true brightness.
This shift to a lumen-based evaluation allows for a more accurate assessment of a fixture's performance and is essential for a successful lighting plan.
How Many Lumens Do You Need Per Room?
Calculating the right amount of brightness is a key step in deciding how many recessed lights you need. The process involves determining the total lumens required for a space and then dividing that number by the lumen output of the chosen fixture. Professionals use target lumen levels, often measured in lumens per square foot (also known as foot-candles), to establish these requirements.
A general guideline for different lighting layers is a good starting point.
Lighting Type | Recommended Lumens per Square Foot |
|---|---|
Ambient | 20 |
Task | 50 |
Accent | 30 |
For more specific applications, different rooms have different needs based on the activities performed within them. Kitchens and bathrooms, for example, require significantly more light than living areas.
Room/Lighting Type | Recommended Lumens per Square Foot |
|---|---|
Living Areas | 10 to 20 |
Kitchens/Bathrooms | 50 to 100 |
Task Lighting | 100 to 200 |
The Illuminating Engineering Society (IES) provides professional standards for lighting levels to ensure safety and visual comfort. These recommendations, measured in foot-candles, offer an excellent benchmark for residential projects.
Room | Foot-candles (Lumens per sq. ft.) |
|---|---|
Kitchen – General | 20-50 |
Kitchen – Preparing / Cooking | 50-100 |
Bathrooms | 20-50 |
Rooms for Difficult Reading & Writing | 50-100 |
A Simple Calculation to Determine Total Lumens:
One can follow a straightforward formula to calculate the total lumens needed for any space.
Measure the Room: Calculate the square footage of the room (Length x Width).
Example: A home office is 10 feet by 12 feet, so its area is 120 square feet.
Determine the Foot-candle Target: Using the tables above, select the appropriate foot-candle level for the room's primary function.
Example: For a home office with difficult reading and writing, a target of 50 foot-candles is appropriate.
Calculate Total Lumens: Multiply the room's square footage by the foot-candle target.
Example: 120 sq. ft. x 50 foot-candles = 6,000 lumens.
This calculation reveals that the home office requires a total of 6,000 lumens. If a homeowner selects recessed fixtures that each produce 750 lumens, they would need eight fixtures (6,000 / 750 = 8) to achieve the target brightness. This method provides a solid foundation for planning. However, factors like dark-colored walls (which absorb light) or very high ceilings may require adjusting the total lumens upward. Installing dimmable fixtures offers the flexibility to fine-tune the lighting performance and set the perfect brightness for any activity.
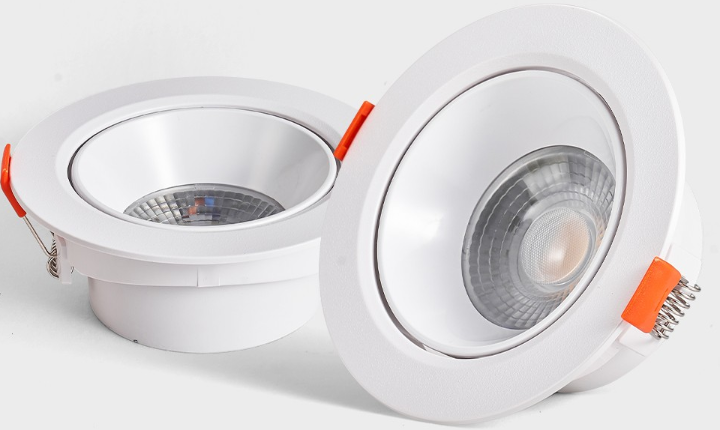
Step 4: Pick a Recessed Downlight Trim for Function and Style
The final step in the selection process is choosing a trim. The trim is the visible part of the recessed downlight, and it serves a dual purpose. It shapes the light output and defines the fixture's aesthetic contribution to the home. Understanding the different types of recessed lighting trims is essential for a successful lighting design.
What is a Recessed Light Trim?
The trim is the component of a recessed lighting fixture that is seen from below. It finishes the opening in the ceiling and can significantly influence both the look of the fixture and the quality of the light it produces.
The Role of the Trim
A trim's primary role is to refine the appearance of recessed lights and control the light beam. Different trim types are engineered to reduce glare, maximize brightness, or direct light toward a specific target. The choice of trim directly impacts the functionality and atmosphere of any indoor space.
Round vs. Square Trim Shapes
The shape of the trim is a key element of the lighting design. Both round and square shapes offer distinct advantages, and the choice often comes down to the desired style for the home.
Pro Tip: The shape of the trim can be a design statement. Square trims complement contemporary decor, while round trims integrate well with classic styles.
Round Trims: These offer a classic, versatile look with soft lines. They blend easily into most architectural styles, from traditional to modern, making them a safe and popular choice.
Square Trims: These provide a modern, geometric touch with distinct angular lines. They create a unique visual element and are ideal for minimalist or contemporary settings where a bold statement is desired.
Baffle Trims for Glare Reduction
Baffle trims are one of the most common types of recessed lighting trims, prized for their ability to create a comfortable indoor environment.
How Baffles Work
Baffle trims feature a series of concentric grooves or ridges on their interior surface. These ridges are designed to absorb stray light and reduce the "hot spot" effect at the light source. This design minimizes glare and creates a softer, more diffused illumination, which is easier on the eyes.
Best for Living Rooms and Bedrooms
The glare-reducing properties of baffle trims make them an excellent choice for spaces dedicated to relaxation. Homeowners often use them in living rooms, dens, and bedrooms where visual comfort is a top priority. The softer light helps create a cozy and inviting atmosphere in any room.
Reflector Trims to Maximize Light
For applications where maximum brightness is the goal, reflector trims are the ideal solution. They are designed to do the opposite of baffle trims.
How Reflectors Work
Reflector trims have a smooth, mirror-like interior surface. Instead of absorbing light, this polished surface reflects it, amplifying the fixture's output. This design efficiently directs more lumens out of the fixture and down into the space, resulting in a brighter, more intense beam of light.
Best for Kitchens and High Ceilings
The high light output of reflector trims makes them perfect for task-oriented areas and large, open spaces. They are commonly used in kitchens to provide bright, clear illumination over countertops and islands. Their ability to push light effectively also makes them the superior choice for rooms with high ceilings, ensuring the space feels bright and well-lit.
Adjustable Trims for Directional Light
When lighting needs to be precise, adjustable trims provide the necessary flexibility. These trims allow homeowners to aim the light beam, making them essential tools for accent lighting and for solving architectural challenges. Understanding the different types of adjustable trims is key to unlocking their full potential.
Gimbal vs. Eyeball Styles
The two primary types of adjustable trims are gimbal and eyeball. While both offer directional control, they function differently.
Gimbal Trims: A gimbal trim pivots within a housing that sits nearly flush with the ceiling. This design offers a clean look while providing significant rotational and tilting capabilities. For example, some gimbal fixtures offer a 30-degree tilt, which is enough to direct light effectively or compensate for angled ceilings.
Eyeball Trims: An eyeball trim features a sphere that extends below the ceiling line to pivot. This design often provides a wider range of motion than a gimbal but is more visually prominent.
The choice between these styles often depends on the desired aesthetic and the required degree of adjustment.
Best for Accent Lighting and Sloped Ceilings
Adjustable trims are the perfect solution for two common lighting challenges. First, they excel at accent lighting. A homeowner can precisely aim the light to highlight a piece of art, a fireplace mantel, or an architectural feature. Second, they are indispensable for sloped ceilings. A standard downlight in a sloped ceiling would cast light at an unhelpful angle. An adjustable trim allows the beam to be corrected and aimed straight down, ensuring proper illumination of the floor and living space below.
Specialty Trims for Specific Applications
Beyond standard options, some trims are engineered for very specific tasks. These specialty types of recessed lighting solve unique environmental and design challenges, from illuminating vertical surfaces to ensuring safety in wet locations.
Wall Wash Trims for Vertical Surfaces
A wall wash trim is designed to cast a broad, even layer of light across a vertical surface. It typically features an integrated scoop or a kicker reflector that directs the light asymmetrically toward the wall. This technique makes a room feel larger and brighter. It is an excellent choice for illuminating a feature wall or a gallery of photos without creating harsh hot spots.
Shower Trims for Wet Locations
Safety is the top priority in bathrooms and other wet areas. A shower trim is a special recessed downlight sealed with a gasket and lens to protect the internal electronics from moisture. These fixtures must have a specific Ingress Protection (IP) rating, which indicates their level of resistance to water and solids. Electrical codes define zones within a bathroom, each requiring a different minimum IP rating.
Bathroom Zone | Location | Minimum IP Rating |
|---|---|---|
Zone 0 | Inside the bath or shower basin | IP67 |
Zone 1 | Directly above the bath or shower (up to 2.25m) | IP45 |
Zone 2 | 0.6m perimeter around bath/shower | IP44 |
Fixtures rated for damp locations (IP54 minimum) are suitable for general bathroom areas with humidity, but fixtures inside a shower enclosure must be wet-rated (IP65 or higher) to withstand direct water contact. Choosing the correct rating from the available types of recessed lighting is not just a design choice; it is a critical safety requirement.
Understanding Recessed Lighting Housings: New vs. Remodel
Beyond the visible trim, the housing is the unseen engine of a recessed lighting fixture. Selecting the correct housing type—new construction or remodel—is a foundational decision that depends entirely on the state of the ceiling. This choice dictates the installation method and is crucial for a successful indoor lighting design.
What is a Recessed Lighting Housing?
The housing is the fixture component installed inside the ceiling. It contains the electrical wiring and mounting hardware, providing the structure for the trim and light source.
The "Can" in "Can Light"
The term "can light" comes from the cylindrical shape of the housing, which resembles a metal can. This enclosure protects the fixture's internal components and ensures safe operation within the ceiling cavity. It is the part of the recessed lighting that connects directly to the home's electrical system.
IC-Rated vs. Non-IC Rated Explained
Housings are categorized based on their interaction with insulation. This is a critical safety distinction.
IC-Rated (Insulation Contact): These housings are designed to be in direct contact with ceiling insulation. They are built to manage heat safely, preventing any fire hazard.
Non-IC Rated (Non-Insulation Contact): These housings require a minimum clearance of three inches from any insulation. They are typically used in ceilings without insulation.
Most building codes mandate that recessed lights installed in insulated ceilings must be IC-rated. Using a non-IC fixture in this scenario is a code violation that can lead to safety risks and costly repairs. IC-rated downlights are designed to meet these specific building code requirements, ensuring legal compliance for any home.
New Construction Housings
New construction housings are designed for installation before the drywall is put up. They are the preferred choice when there is open access to the ceiling joists.
When to Use Them
These housings are used during a major renovation or in a new build where the ceiling framing is exposed. Their design allows them to be mounted directly to the ceiling joists, providing a very secure and stable installation.
Key Installation Considerations
New construction housings include a mounting frame with hanger bars that attach to the joists. Installers must ensure the bottom edge of the housing is flush with the planned ceiling level. According to the National Electrical Code (NEC), specific clearances must be maintained for non-IC fixtures, while IC-rated fixtures can be in direct contact with combustible materials.
Remodel Housings
Remodel housings are the solution for adding recessed lights to an existing, finished ceiling. They are engineered for installation from below, through the hole cut for the fixture itself.
When to Use Them
A homeowner should choose a remodel housing when they are upgrading the indoor lighting in a room with an intact ceiling. This type is perfect for retrofit projects where opening up the entire ceiling is not feasible. The process of installing led recessed lights of this type is accessible for many projects.
Key Installation Considerations
Installation involves cutting a precise hole in the drywall using a hole saw. The remodel housing is then pushed up through the opening. Spring-loaded clips or friction brackets deploy from above, clamping the housing securely to the drywall. This clever lighting design allows for a clean installation without needing access to the ceiling joists, making it a versatile option for any home improvement project.
The Rise of Canless (All-in-One) LED Recessed Lights
Recent advancements in LED technology have introduced a significant innovation in recessed lighting: the canless, all-in-one fixture. This modern design integrates the light source and trim into a single, slim unit connected to a remote driver box. It eliminates the need for a traditional housing or "can," streamlining both the fixture's profile and its installation.
Benefits of Canless Fixtures
Canless recessed lights offer substantial advantages in performance and efficiency. Their primary benefit is superior energy efficiency. The integrated solid-state LED technology consumes significantly less power, often just 9 to 10 watts per fixture, while producing minimal heat. This design also creates an airtight seal with the ceiling, preventing the air leakage and heat loss common with older can-style housings. This improved energy efficiency leads to direct savings on both lighting and cooling costs.
The best led downlights in this category deliver excellent lighting performance. They provide long-term value through an extended lifespan, which reduces maintenance needs and lowers energy bills over time. Many models are also dimmable, offering homeowners flexible control over their indoor atmosphere. The compact profile of these fixtures makes them an ideal solution for ceilings with limited space, such as those with shallow plenums or obstructions.
Installation Simplicity
The process of installing led recessed lights of the canless variety is remarkably straightforward. This simplicity translates directly into lower labor costs and faster project completion times. Installers simply cut a hole in the drywall, wire the remote driver box, and secure the fixture into the opening with its built-in, spring-loaded clips.
This method is considerably faster than installing traditional recessed lights. It removes the complex step of mounting a bulky housing to ceiling joists.
While the upfront cost per fixture is often comparable to traditional models, the overall project cost is typically lower due to reduced labor.
Cost Aspect | Canless Recessed Lights | Can Recessed Lights |
|---|---|---|
Fixture Cost | $20 to $80 per fixture | $20 to $80 per fixture |
Labor Time | 1 to 2 hours | 2 to 3 hours |
Labor Cost | Lower | Higher |
This efficient installation makes canless fixtures an attractive option for both professional installers and savvy DIY homeowners seeking high-quality performance without the complexity of traditional systems.
Putting It All Together: A Room-by-Room Guide to Choose Right Recessed Downlight

Applying the principles of purpose, size, and quality room by room is the final step in how to choose recessed lighting. A successful indoor lighting plan tailors the fixtures to the specific activities of each space. This practical guide on recessed lighting by room provides clear formulas for the most common areas in a home.
The Living Room Formula
The living room is a multi-functional space for relaxation and socializing. The lighting design should be flexible and layered to accommodate different moods and activities.
General Lighting Combination
A layered approach creates a balanced and inviting atmosphere. Homeowners can calculate the total lumens needed by multiplying the room's square footage by a factor of 10-20. For a 300-square-foot room, this means a target of 3,000 to 6,000 lumens. A successful combination might include:
A central fixture or a grid of 4-inch recessed lights for ambient light.
Wall sconces to add soft, peripheral illumination.
Table or floor lamps for localized task lighting.
Accent and Wall Wash Recipes
To add visual interest, homeowners can use adjustable 3-inch recessed lights to highlight artwork or architectural features. A wall wash trim on recessed lighting spaced 2-3 feet from a feature wall can make the entire room feel larger and more sophisticated.
The Kitchen Formula
The kitchen demands a more functional lighting strategy, prioritizing clarity and safety for various tasks. This is where a robust indoor plan truly shines.
General Lighting Combination
For general illumination, a grid of 4-inch or 6-inch recessed lights provides excellent coverage. Professionals recommend a brightness level of 30 to 50 lumens per square foot for this ambient layer. This ensures the entire space is well-lit and free of shadows.
Task Lighting Over Counters and Sinks
Effective task lighting is critical in the kitchen. Homeowners should install recessed lights directly over the edge of countertops to illuminate prep areas without casting shadows.
For these key work zones, a higher brightness of 70-100 lumens per square foot is ideal. It is also essential to select fixtures with a CRI of 90 or higher. This high color rendering ensures food colors appear accurate and vibrant, which is crucial for cooking.
The Bedroom Formula
The bedroom is a sanctuary for rest, so the lighting should promote a calm and relaxing environment. The goal is to create a soft, comfortable space with options for specific activities.
General Lighting Combination
A central grid of 4-inch recessed lights with baffle trims is an excellent choice. Baffles reduce glare, creating a softer light that is easy on the eyes. Installing these fixtures on a dimmer switch gives homeowners complete control over the ambiance.
Task Lighting for Reading Nooks
For reading in bed or in a dedicated nook, adjustable recessed lights provide focused illumination. A 3-inch gimbal trim can be aimed directly at the reading material, delivering bright, targeted task lighting without disturbing a partner. This completes a versatile and comfortable lighting design for any modern home.
The Bathroom Formula
Bathroom lighting must balance ambiance with high-function clarity. A successful lighting design in this room layers general illumination with precise task lighting, all while adhering to strict safety standards for wet environments.
General Lighting Combination
For general lighting, homeowners should use a grid of 4-inch recessed lights with a wet rating. This ensures safety and durability in a humid environment. A neutral white color temperature of around 3500K provides a clean, bright feel without being too sterile. This base layer of recessed lighting ensures the entire space is safely navigable.
Task and Shower Lighting Recipes
Effective task lighting at the vanity is crucial for grooming. The goal is to eliminate shadows on the face. A professional lighting design achieves this with specific fixture placements.
To create balanced, shadow-free illumination, homeowners should consider these vanity lighting strategies:
Mount vertical fixtures or sconces on each side of the mirror. The center of the lights should be at eye level, approximately 36 to 40 inches apart.
If side lighting is not possible, use a horizontal fixture at least 24 inches long. Mount it 75 to 80 inches above the floor.
Select fixtures with a high CRI to ensure accurate skin tone representation.
For the shower itself, a dedicated wet-rated recessed light is a necessity. This fixture must be sealed to prevent moisture intrusion, providing safe and direct illumination. This focused approach to task lighting is a key part of how to choose right recessed downlight for a modern home.
The Home Office Formula
The home office requires a lighting plan that supports focus and reduces eye strain. The right combination of general and task lighting creates a productive and comfortable workspace.
General Lighting Combination
A uniform grid of 4-inch recessed lighting provides excellent ambient light for the home office. A cool white color temperature between 4000K and 5000K can enhance alertness and concentration. Using dimmable fixtures allows for brightness adjustments throughout the day.
Task Lighting for Your Desk
General overhead lighting alone is often insufficient for desk work, as it can cast shadows from the user's body. To solve this, homeowners should install dedicated task lighting. Placing one or two 3-inch or 4-inch recessed lights in the ceiling slightly in front of the desk area is an effective solution. This placement directs light onto the work surface, keyboard, and documents without creating glare on a computer screen. This targeted approach is essential for a functional home office.
Homeowners can now confidently choose right recessed downlight. A successful selection of a recessed downlight follows four key steps: defining purpose, selecting size, picking light quality, and matching the trim. This knowledge empowers anyone to create a superior indoor lighting design for their home.
The core principle is simple. Match the recessed lighting to the room's atmosphere and its functional needs, from general illumination to focused task lighting.
With this guide, homeowners can choose right recessed downlight to build a beautiful and functional indoor lighting plan. A thoughtful lighting design transforms any indoor space, ensuring the task lighting is effective and the home feels welcoming.
FAQ
Can homeowners mix different sizes of recessed lights?
Yes, mixing sizes creates a sophisticated, layered design. A common strategy involves using larger 4-inch or 6-inch lights for general ambient lighting. Smaller 2-inch or 3-inch adjustable fixtures can then provide focused accent or task lighting, adding depth and function to the room.
How far should recessed lights be from walls?
The ideal distance depends on the lighting effect. For general illumination, a standard practice is to place the fixture half the distance of the spacing between lights.
For example, if lights are 4 feet apart, they should be 2 feet from the wall. Wall washing or grazing techniques require specific, closer placements.
Are canless LED lights better than traditional cans?
Canless fixtures offer distinct advantages for many projects.
Their slim profile fits in shallow ceiling plenums.
They create an airtight seal, improving energy efficiency.
Installation is typically faster, which can lower labor costs.
Can recessed lights be installed in a sloped ceiling?
Yes, installation in a sloped ceiling requires specific hardware. Homeowners must use fixtures with an adjustable trim, such as a gimbal or eyeball style. This allows the light beam to be aimed straight down, providing correct illumination on the floor below.
What does an IC rating mean and why is it important?
An IC rating is a critical safety feature. It indicates that a fixture is approved for direct contact with insulation. Using the correct type is a building code requirement.
Rating | Meaning |
|---|---|
IC-Rated | Safe for Insulation Contact. |
Non-IC Rated | Requires 3 inches of clearance from insulation. |
How do I make my recessed lights dimmable?
Achieving smooth dimming requires a compatible system. The following three components must all be rated for dimming and designed to work together:
The LED recessed light fixture.
The LED driver (power supply).
The wall dimmer switch.