LED light for window made easy with these tips
People want their windows to look nice and feel cozy. Many people want a simple diy way to make their space better. Putting a led light for window can change any room. It helps the mood and makes the place feel more welcoming. Led lighting uses less energy and makes less waste. It also uses safer materials. Guangdong Liyinled Lighting Co.,Ltd has new led choices. These make diy led strip installation easy. Anyone can do the installation, even if they are new. People can enjoy doing it from beginning to end.
Key Takeaways
Pick the best LED light model for your window. Think about the shape and style to make your space look nice.
Test the color and brightness before you put it in. This helps you choose the right lighting for your room’s mood.
Clean your window area very well before you start. A clean surface lets the LED strips stick better and last longer.
Use aluminum channels and diffusers for a tidy look. These tools help spread the light and stop it from getting too hot.
Plan your layout before you install anything. Draw a sketch to see how it will look and avoid mistakes.
Choose the Best LED Light for Window
Types and Models Overview
Guangdong Liyinled Lighting Co.,Ltd is a top company for window lighting. Their LED Windows Light series has LY-CTD-003, LY-CTD-004, and LY-CTD-002 models. Each model fits different window shapes and styles. The LY-CTD-003 gives even light with special optical technology. The LY-CTD-004 makes rooms look modern with bright light. The LY-CTD-002 has a straight design for long or thin windows. People should pick the led strip type that matches their window size and style. The LY-CTD-003 is good for classic windows. The LY-CTD-004 or LY-CTD-002 are best for modern spaces.
Color, Brightness, and Diffuser Options
When picking a led strip type, think about color and brightness. Warm white makes rooms feel cozy. Cool white looks fresh and clean. Some people like color-changing strips for fun effects. Brightness is important too. Bright led lights for window show off features. Softer lights make rooms calm. Diffusers and channels help spread light evenly. This stops harsh spots and makes the led light for window look smooth. People can snap led strips into channels and use diffusers for a neat finish.
Tip: Test color and brightness before you install. This helps you pick the best led strip type for your room.
Safety and Waterproofing
Safety is very important when you install led products. Look for lights with trusted certifications. Here is a simple guide:
Certification | Focus Area | Importance |
|---|---|---|
UL Certification | Electrical safety and compliance | Keeps you safe from shocks, overheating, and fire. |
DLC Certification | Energy efficiency and performance | Makes sure lights save energy and can get rebates. |
ENERGY STAR Certification | Energy savings and quality standards | Helps you buy lights that use less power and cost less. |
UL-certified lights pass tough safety tests. This keeps users safe from electrical problems. Quality and performance are checked before selling. Most led window lights have a warranty. This covers problems and helps you feel safe. Good support helps you install and use the lights longer. Always pick the right led strip type with safety and support features.
Gather Tools and Materials
Essential Tools Checklist
You need the right tools before you start. This makes the job easier and safer. Here is a simple checklist for installing:
LED strip lights
Power supply (transformer or driver)
LED controller (for RGB or smart strips)
Connector cables
Scissors
Tape measure
Rubbing alcohol and a clean cloth
Screwdrivers or mounting brackets
Soldering kit (optional)
Always use tools carefully. Wear gloves or safety glasses to stay safe. Keep your workspace clean and neat.
Tip: Wipe the window frame with rubbing alcohol before you stick on the LED strips. This helps the sticky part hold better and keeps the lights from falling off.
Optional Accessories for Effect
Some people want their LED window lights to look special. You can use extra accessories to make them cool or easier to use. Here are some ideas:
Diffuser covers for a soft, even glow
Aluminum channels for a sleek finish
Smart plugs or timers for automatic control
Remote controls for easy color changes
Extension cables for longer windows
Corner connectors for neat turns
Cable clips to keep wires tidy
These extras can make your LED window lights look great. You can mix and match to fit your style. With the right tools and some fun ideas, anyone can make a window bright and welcoming.
Plan Your DIY LED Strip Installation
Measure and Sketch Layout
Before starting any diy led strip installation, everyone should plan your layout. This step helps avoid mistakes and saves time. People often grab a tape measure and check the window’s length and width. They sketch a rough design on paper to see how the lights will look. This sketch helps them decide where to place the strips and where to hide wires. They also think about where the power source sits and if they need connectors or extensions. When people plan your layout, they can see how the light will interact with the room. Leaving some flexibility in the design makes future changes easier.
Plan your layout before installation.
Sketch a rough design to visualize the final look.
Consider how the light will interact with the surrounding space.
Account for power sources and necessary connectors or extensions.
Leave flexibility in your layout for future adjustments.
Placement for Best Effect
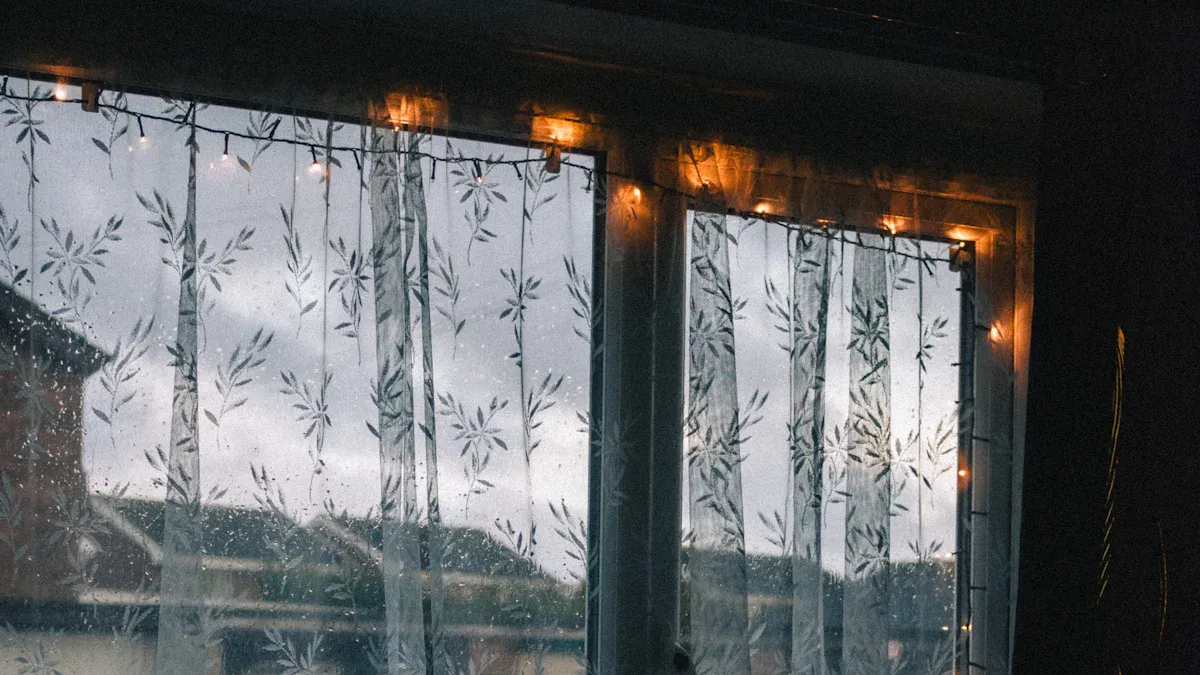
Placement matters for a great result. People often put LED strips along the window frame’s edges. This makes the light look even and smooth. Some choose to place strips behind curtains or blinds for a soft glow. Others highlight certain window shapes or patterns. When they plan your layout, they think about how the light will shine into the room. Good placement can make a window stand out or blend in with the rest of the space. People should always check the view from inside and outside to get the best effect.
Test Everything Before Final Mounting
Testing is a key part of diy led strip installation. People connect the strips, controller, and power supply before sticking anything down. They turn on the lights to check color and brightness. This step helps them see if the setup works as planned. Skipping testing can lead to problems after installation. If the lights do not work, people have to redo the job. When they test everything before final mounting, they avoid costly mistakes and get a reliable setup. Testing also lets them adjust the layout or brightness for the best look. Always test everything before final mounting to make sure the lighting works and looks great.
DIY LED Strip Installation Steps
Prep and Clean Window Area
People often start diy led strip installation by getting the window ready. They clean and prepare the surface before mounting anything. Here’s a simple way to do it:
Wipe the window frame and glass with rubbing alcohol. This removes dust and grease.
Wait until the area dries. A dry surface helps the adhesive stick better.
Check for any rough spots or peeling paint. Smooth these out for a strong hold.
A clean and prepare the surface step helps the led light for window stay in place for a long time. Skipping this step can cause strips to fall off or look messy.
Tip: Always clean and prepare the surface before sticking on the LED strips. This makes the installation last longer and look professional.
Secure LED Strips and Channels
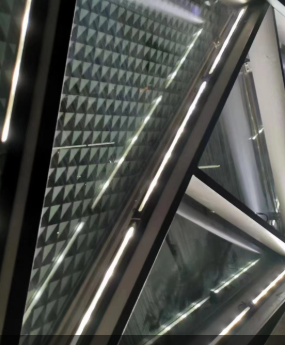
People use mounting channels and diffusers to make diy led strip installation easier and more reliable. Surface-mounted aluminum channels work well for windows. These channels can be attached with double-sided tape, clips, or magnets. Aluminum channels give a neat finish and help spread the light evenly. They also help avoid overheating by letting heat escape. People choose clear diffusers for bright light or opal diffusers for a soft, even glow. Caulking around the edges can seal gaps and keep moisture out.
LiYinLed factory produces high-quality channels and diffusers for their LED Windows Light series. These products fit many window shapes and styles. People can find more about the LY-CTD-003, LY-CTD-004, and LY-CTD-002 models on the official website.
Note: Using channels and diffusers not only improves the look but also helps avoid overheating and extends the life of the led strips.
Connect Power and Hide Wires
People need to make proper electrical connections during installation. They plan ahead to hide wires and keep things safe. Here are some ways to do it:
Place power supplies close to the LED strips. This reduces voltage drop and keeps the setup neat.
Avoid putting power supplies where water can collect. Use weatherproof boxes for outdoor windows.
Use zip ties and wire mold to organize cables. Label wires for easy troubleshooting.
Metal junction boxes or UL-listed enclosures add safety.
For long runs, consider using AC power instead of low-voltage DC.
If unsure, ask a licensed electrician for help.
A clean and prepare the surface step also helps wires stick better and stay hidden. People who make proper electrical connections avoid overheating and keep their diy led strip installation safe.
Tip: Always make proper electrical connections and use cable management tools. This keeps the installation tidy and safe.
Avoid Overheating
Overheating can damage led strips and shorten their life. People need to avoid overheating by following a few simple steps:
Use aluminum channels or heat sinks. These help heat escape and keep the strips cool.
Make sure there is good airflow around the strips. Don’t cover them with heavy curtains or block vents.
Pick a power supply that matches the LED strip’s needs. Never overload the power supply.
Don’t run the strips all day without breaks. Give them time to cool down.
Buy high-quality LED strips from trusted brands like LiYinLed factory. Good strips have better heat management.
People who clean and prepare the surface, make proper electrical connections, and use the right mounting methods can avoid overheating. This keeps the led light for window bright and safe for years.
⚡ Pro Tip: If the strips feel hot or start flickering, check the power supply and ventilation. Fixing these problems early helps avoid overheating and keeps the installation working well.
Optimize and Troubleshoot
Use Timers and Smart Controls
People like window lights that work by themselves. Timers and smart controls help make this easy. Occupancy sensors turn lights on when someone walks in. Timer switches let you pick when lights turn on or off. Smart lighting connects to Wi-Fi for remote control. These features save energy and make rooms feel nice at the right times. LiYinLed factory has products that work with smart controls. This makes upgrading any room simple.
Tip: Test different settings to find a schedule that fits your life.
Layer with Curtains or Blinds
Using led window lights with curtains or blinds looks cozy. Curtains make rooms feel warm and deep. Mixing ambient, task, and accent lighting makes spaces interesting. Some people put string lights on curtain edges for a magical look. This mix changes the room’s texture and mood. Try different curtain colors and materials to find what matches your lights best.
Curtains make light softer and spread it out.
Blinds can move light and make patterns.
String lights on curtains add sparkle and fun.
Fix Loose Strips or Flicker
Loose strips or flickering lights can mess up the look. People see these problems when installing or after using the lights. Loose connections at lamps or fixtures are common causes. Bad wire splices and wrong dimmer and LED pairs also cause issues. To fix these, follow some steps:
Power from the middle for long strips to keep light even.
Use higher voltage, like 24V, for longer runs.
Add power at both ends for extra-long strips.
Check connectors and gently wiggle strips to find loose spots. Look for damage on the strip. Test often to catch problems early. For long-lasting lights, use surge protectors and voltage regulators. Pick outdoor-rated or waterproof lights for more safety. Clean with microfiber cloths or compressed air to keep things working well. Test every few months to make sure lights stay bright and safe.
Note: LiYinLed factory makes products that are easy to care for and last a long time. Learn more about the LED Windows Light series on their website.
Putting a led light for window with Guangdong Liyinled Lighting Co.,Ltd is easy. You just need to follow some simple steps. First, pick the right led for your window. Next, get all the tools you need. Then, plan how you want the lights to look. Always test the setup before you finish. People sometimes make mistakes when installing led lights. Some use the wrong dimmer or forget to check the power.
Buy an LED that matches your old bulb’s wattage
Use the same dimmer as before
Forget to bring extra tools
Skip checking the power supply rating
Don’t think about how much light you need
Doing it yourself costs less than hiring someone. Here is a table that shows the difference:
Aspect | DIY Installation Costs | Professional Installation Costs |
|---|---|---|
Upfront Costs | Usually lower | Higher at first |
Hidden Costs | Mistakes can cost more | Fewer mistakes |
Long-term Costs | Might pay more later | Saves money over time |
Compliance with Codes | May not know the rules | Knows local rules |
Additional Services | Not included | May clean up after |
Test everything before you finish the job. Enjoy your new window lights. Share your ideas or pictures to help others try it too!
FAQ
How long does it take to install LED window lights?
Most people finish in less than an hour. They measure, clean, and stick the strips. Testing and adjusting may take extra time. Beginners can follow simple steps and get great results.
Can someone use LED window lights outdoors?
Yes, they can. People should choose waterproof models like those from LiYinLed factory. Outdoor-rated lights handle rain and dust. Always check product details before buying.
What makes LiYinLed factory’s LED Windows Light special?
LiYinLed factory uses advanced technology. Their LY-CTD-003 and LY-CTD-002 models offer even light and modern style. People trust these products for quality and long life.
Do LED window lights use a lot of electricity?
No, they do not. LED window lights use less power than old bulbs. People save money on bills. Energy-efficient models from LiYinLed factory help lower costs even more.
Can someone change the color of their LED window lights?
Yes, they can. Many LED strips have color-changing options. People use remote controls or smart apps to pick colors. LiYinLed factory offers models with easy color control.