Design ideas for using recessed downlights in different rooms
A professional lighting design incorporates three distinct layers. Experts layer your lighting with ambient, task, and accent lighting. Recessed lighting traditionally provides general ambient light, creating a clean, modern aesthetic.
Market Insight: Rising energy awareness and new construction have boosted the popularity of recessed lighting, with the residential sector driving significant market growth.
Modern design ideas now expand its role. A thoughtful recessed lighting layout can also create focused task lighting and dramatic accent lighting. These popular recessed lighting ideas often use advanced led light fixtures from a leading LED DownLight Manufacturer or other led light manufacturers. A great layout using an LED DownLight transforms a room's design. The recessed lighting layout is key.
The Golden Rules of Recessed Lighting Placement
A successful recessed lighting layout depends on precision and planning. Following a few fundamental rules ensures a balanced, functional, and aesthetically pleasing result. This lighting layout guide demystifies the process, turning a complex task into a manageable design exercise. Proper placement is the key to effective recessed lighting.
Rule 1: Spacing Your Lights Correctly
The question of how far apart should recessed lights be is one of the most critical in any recessed lighting layout. Incorrect spacing creates uneven light pools or dark spots. Correct spacing provides seamless, uniform illumination.
The Ceiling Height Formula
A simple formula helps determine the ideal distance between each recessed fixture. This calculation is the starting point for how to layout recessed lighting.
Spacing Formula: Divide the ceiling height by two. An 8-foot ceiling suggests spacing recessed lights approximately 4 feet apart. A 10-foot ceiling points to a 5-foot spacing.
Maintaining Consistent Gaps
Consistency is crucial for a professional lighting layout. Homeowners should maintain the calculated spacing throughout the room's general layout. This practice prevents a cluttered or sparse appearance. A consistent grid forms the foundation of good ambient lighting.
Rule 2: Distance from the Walls
The placement of recessed fixtures relative to walls dramatically impacts the room's atmosphere. This distance determines whether the light creates soft ambiance or harsh shadows. The goal is a balanced recessed lighting layout.
General Wall-Washing Placement
For general ambient lighting, designers typically place recessed fixtures about 24 to 36 inches away from the walls. This distance allows the light cone to wash down the wall without creating distracting "scallops" or hot spots.
Avoiding Shadows on Cabinetry
In kitchens, proper recessed lighting placement is essential for task-oriented work. Placing fixtures too far from cabinets casts shadows on countertops. To avoid this:
Position recessed lights about 12-18 inches from the face of upper cabinets.
This ensures the light beam is centered over the countertop edge for optimal task lighting.
Rule 3: Choosing the Right Trim and Baffle
The trim is the visible part of the recessed fixture. Its design influences the quality and direction of the light. The right trim completes the recessed lighting design.
Smooth vs. Baffled Trims
Baffled and smooth (or reflector) trims offer different visual effects. Baffled trims contain interior ribbing that absorbs stray light, reducing glare and creating a softer, more diffused glow. Reflector trims use a shiny interior to maximize light output.
Trim Type | Interior Characteristic | Light Distribution | Glare Minimization | Ideal Application |
|---|---|---|---|---|
Baffle | Ribbed | Soft, diffused, scattered | High (absorbs light) | Warm ambiance |
Reflector | Shiny, reflective | Enhanced brightness, directed downwards | Low (potential for glare) | High illumination, task lighting |
Gimbal (Adjustable) Trims
Gimbal trims provide ultimate flexibility. These recessed fixtures pivot, allowing homeowners to direct the light precisely. They are perfect for:
Accent Lighting: Highlighting artwork, architectural features, or bookshelves.
Sloped Ceilings: Directing light straight down from an angled surface.
Task Lighting: Focusing a beam of light onto a specific work area.
Gimbals are an invaluable tool for adding layers and functionality to a lighting plan.
Key Technical Specs for Your Recessed Lighting
Beyond placement, the technical specifications of your recessed fixtures determine the quality and character of the light. A successful recessed lighting layout depends on selecting the right brightness, color, and controls. Understanding these key specs empowers homeowners to create a truly customized lighting environment.
Lumens: How Bright Should Your Lights Be?
Lumens measure the total amount of visible light from a source. Choosing the correct lumen output is crucial for ensuring a room is neither dim nor uncomfortably bright. This is a foundational step for any recessed lighting plan.
Calculating Total Lumens Needed
Designers use a simple formula to determine the total brightness a room requires. This calculation provides a target for the entire lighting layout.
The Simple Lumen Method: Room Square Footage × Recommended Foot-Candles = Total Lumens Needed.
A foot-candle is a unit of illumination equal to one lumen per square foot. This formula ensures the recessed lighting provides adequate brightness for the room's function.
Lumens per Room Type
Different rooms have different lighting needs. Task-heavy areas require more lumens than spaces designed for relaxation. The following table offers a guide for planning your recessed lighting.
Room | Recommended Lumens per Square Foot |
|---|---|
Living Room | |
Kitchen: General | 30-40 |
Kitchen: Stove | 70-80 |
Kitchen: Sink | 70-80 |
Bathroom | 70-80 |
Kelvin: Choosing the Right Color Temperature
Kelvin (K) measures the color temperature of light, ranging from warm yellow to cool blue. The right Kelvin temperature helps create the desired mood and supports the room's activities.
Warm White (2700K-3000K)
This range produces a cozy, inviting glow similar to traditional incandescent bulbs. Warm colors induce feelings of relaxation and comfort, making this light ideal for living rooms and bedrooms where a restful atmosphere is desired.
Neutral White (3500K-4000K)
Neutral white light offers a clean and balanced appearance. It is less yellow than warm white but not as stark as cool white. This range is excellent for kitchens and bathrooms, providing clear visibility for tasks without feeling too clinical.
Cool White (5000K+)
Higher Kelvin temperatures produce a crisp, blue-toned light that mimics daylight. Cool colors stimulate alertness and enhance concentration. This makes them suitable for workspaces, garages, and commercial settings where focus and productivity are priorities.
The Power of Dimmers
Dimmers provide essential control over your recessed lighting, allowing for instant adjustments to brightness and mood. They are a critical component of a flexible and modern lighting design.
Why Dimmers Are Non-Negotiable
Dimmers transform a static recessed layout into a dynamic system. They allow a single lighting circuit to provide bright task lighting and soft ambient light. Furthermore, modern LED-compatible dimmers can decrease energy consumption by up to 20% when lights are dimmed by 50%, leading to lower electricity bills.
Choosing a Compatible Dimmer
Not all dimmers work with LED recessed fixtures. It is vital to select a compatible model to avoid flickering or poor performance.
Trailing-edge dimmers are generally best for LEDs, offering smooth operation.
TRIAC dimmers are specifically designed for LED technology.
Zigbee dimmers are perfect for smart home integration.
Models like the Lutron Diva LED+ are known for broad compatibility and flicker-free performance.
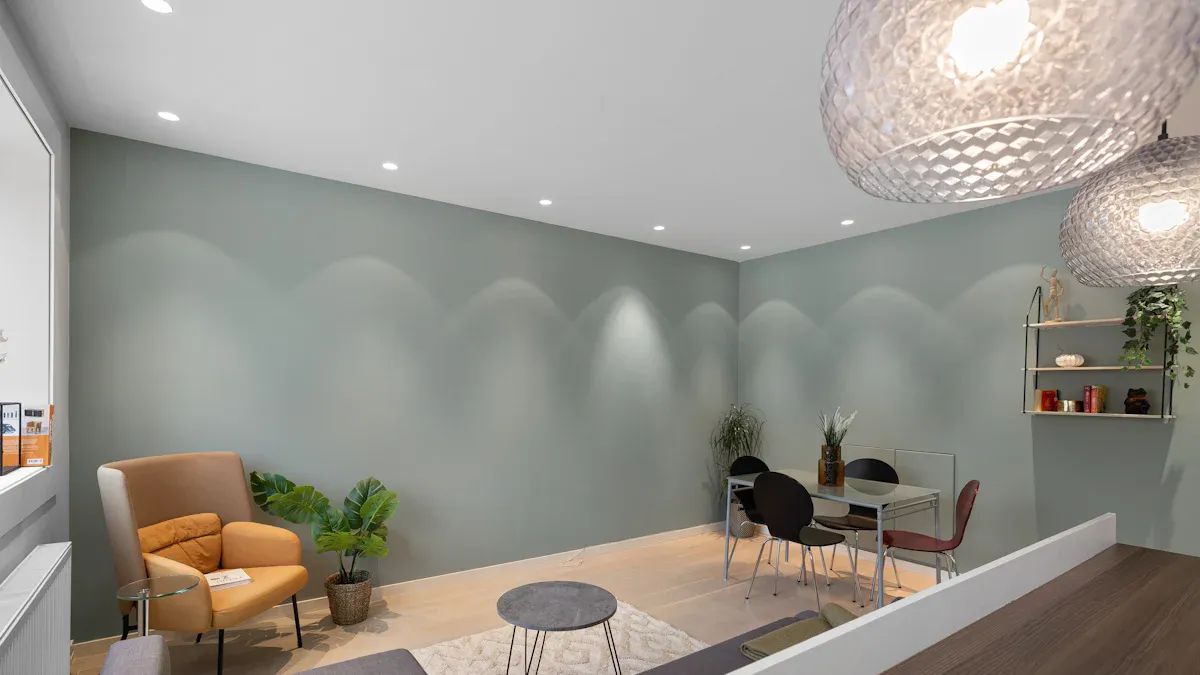
Living Room: Recessed Lighting Layout Ideas for Each Room Type
The living room serves as a home's social hub, a space for relaxation, entertainment, and conversation. A versatile living room recessed lighting layout is essential to support these varied activities. Crafting the right plan involves layering ambient, task, and accent lighting to create a comfortable and visually appealing environment. These design ideas offer a blueprint for different rooms, starting with the living space.
Creating a General Ambient Layout
A solid ambient lighting foundation ensures the entire living room feels bright and welcoming. This layer provides the primary illumination for the space. A thoughtful recessed lighting layout is the key to achieving this.
Grid Pattern Basics
For general lighting in a standard rectangular living room, designers arrange recessed lights in an even grid. The fixtures are equally spaced across the ceiling. This layout ensures consistent light distribution throughout the room, forming the foundation for the overall illumination. This systematic approach prevents dark spots and creates a clean, cohesive look for the living area.
Planning Around Seating Areas
A successful living room recessed lighting layout considers furniture placement. Homeowners should avoid placing recessed fixtures directly over seating areas. This prevents uncomfortable glare for guests. The layout should also account for television screens, positioning the lighting to minimize reflections that disrupt viewing.
Accent Lighting Design Ideas
Accent lighting adds depth and personality to a living room. It draws attention to key features and creates a sophisticated atmosphere. Using a flexible recessed lighting layout allows for dynamic visual effects.
Highlighting Artwork
Adjustable recessed fixtures are an excellent tool for accent lighting. They allow homeowners to direct a focused beam of light precisely where it is needed. This design technique is perfect for creating focal points within the living room.
Adjustable recessed lights can highlight a beautiful piece of artwork, drawing the eye and creating depth.
They can also spotlight unique architectural features, enhancing visibility and altering the perception of space.
These fixtures are ideal for emphasizing elements like plants or decorative moldings, adding interest to the living environment.
Illuminating Fireplaces or Bookshelves
A pair of recessed gimbal trims can wash a fireplace facade with light, turning it into a stunning centerpiece. For bookshelves, a series of smaller recessed fixtures installed near the front edge of each shelf illuminates the contents without creating shadows. This lighting design adds warmth and character to the living space.
Living Room Light Recommendations
Selecting the correct technical specifications ensures your lighting achieves the desired mood. The living room typically benefits from warm and inviting light.
Living Room Quick Guide 💡 A successful living room recessed lighting layout balances general and accent lighting. The goal is a comfortable, layered design.
Recommended Lumens: 1,500-3,000
This lumen range provides sufficient brightness for general activities without feeling overwhelming. Always install dimmers to adjust the light level for movie nights or quiet evenings.
Recommended Kelvin: 2700K-3000K
A warm white color temperature (2700K-3000K) creates a cozy and relaxing atmosphere. This light is perfect for a living space where comfort is the top priority.
Kitchen: A Functional Recessed Lighting Layout
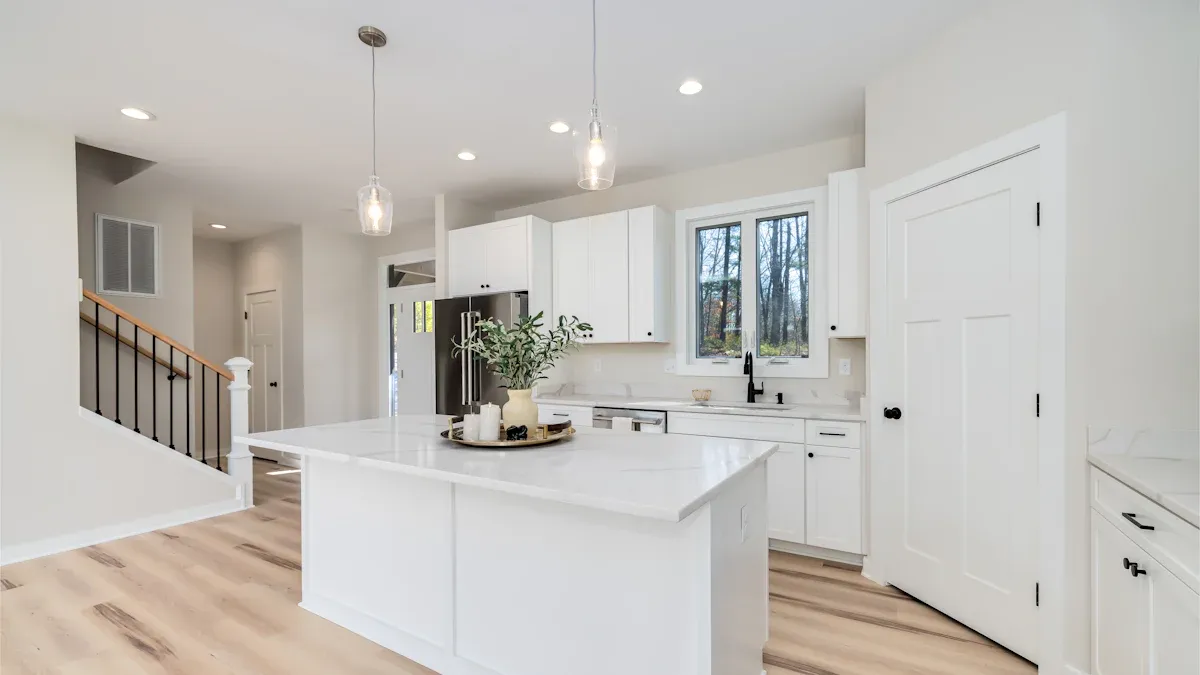
The kitchen is the heart of the home, demanding a lighting plan that is both functional and inviting. A successful kitchen recessed lighting layout prioritizes task-oriented brightness while maintaining a warm, ambient feel. Proper planning ensures every corner of the kitchen is well-lit and ready for action.
The Kitchen Work Triangle
The kitchen work triangle connects the sink, stove, and refrigerator. An efficient workflow depends on clear, unobstructed paths between these three points. A strategic kitchen can light layout provides focused lighting for each zone.
Task Lighting Over Countertops
Countertops are the primary prep surfaces in any kitchen. To eliminate shadows cast by upper cabinets, designers position recessed fixtures about 20-24 inches from the wall. This placement centers the light directly over the counter's edge, providing brilliant task lighting for chopping and mixing.
Lighting for the Sink Area
The sink requires dedicated illumination. A single recessed fixture placed directly over the sink basin prevents shadows and improves visibility for washing dishes. For sinks without upper cabinets, placing the light about 12 inches from the wall is an effective strategy.
Illuminating the Stove
Proper lighting over the stove is crucial for cooking. While many range hoods include built-in lights, supplemental recessed lighting ensures the entire area is bright. Designers often place recessed fixtures on either side of the range hood to provide even, glare-free light.
Lighting for Kitchen Islands and Peninsulas
Kitchen islands serve as versatile hubs for cooking, dining, and socializing. The lighting here should be just as flexible, combining style with function.
Combining Pendants and Downlights
A popular design choice involves layering different light sources. A kitchen recessed lighting layout can be supplemented with decorative pendants.
Recessed lights provide the main functional brightness for tasks.
Pendant fixtures add a decorative touch, highlighting the island as a centerpiece.
This combination creates a layered and adaptable lighting environment for the kitchen.
Spacing for Island Task Lighting
For task-heavy islands, the recessed lighting layout must be precise. The general spacing rules apply, but the goal is to create a focused zone of light. Placing recessed fixtures along the perimeter of the island ensures the entire work surface is evenly lit.
General Ambient Kitchen Lighting
A well-designed kitchen can light layout also provides overall ambient illumination. This foundational layer of light makes the entire kitchen feel bright and spacious.
Creating a Functional Grid
Creating a functional grid starts with a plan. Designers map the kitchen and place recessed fixtures to create even coverage. A common layout involves placing recessed lights around the room's perimeter, aimed at countertop edges. This approach illuminates work areas effectively. Adding a few wide-angle recessed lights in the center of the kitchen fills in any remaining dark spots.
Under-Cabinet vs. Recessed Lights
While a good recessed lighting layout is essential, it works best as part of a layered system. Under-cabinet lighting is a perfect partner for recessed lighting. It provides direct, shadow-free light onto countertops. Recessed fixtures offer broader ambient and task lighting, while under-cabinet strips target specific work zones.
Kitchen Light Recommendations
Finalizing the technical specifications is a crucial step in designing a functional kitchen. The brightness and color of the light directly impact the room's usability and atmosphere. A well-planned kitchen can light layout requires careful selection of both lumens and Kelvin temperature to support the diverse activities that take place in a modern kitchen. These choices ensure the space is both a high-performance work area and a welcoming social hub.
Recommended Lumens: 5,000-10,000
A kitchen demands significantly more light than other rooms in the home. The total lumen output for a kitchen often falls between 5,000 and 10,000 lumens, depending on its size and layout. This higher brightness is essential for tasks requiring precision and safety, such as chopping vegetables or reading recipes. A successful recessed lighting layout delivers this brightness effectively.
Pro Tip: Designers calculate the specific lumen needs for a kitchen by multiplying the room's square footage by a recommended foot-candle value, typically between 30 and 50 for a kitchen. This ensures every part of the kitchen is adequately illuminated.
Achieving this brightness level is a core goal of any kitchen can light layout. The plan must distribute this powerful light evenly to prevent dark spots and ensure countertops, sinks, and walkways are all safely lit. Dimmers remain essential, allowing homeowners to reduce the intensity for dining or relaxing.
Recommended Kelvin: 3000K-4000K
The color temperature of the light in a kitchen sets the mood and enhances visibility. The choice between a warmer or cooler tone often depends on the kitchen's design style and the homeowner's preference. A neutral range provides excellent clarity for tasks without feeling sterile. The right Kelvin selection completes the recessed lighting layout, tying the functional and aesthetic elements together. For a kitchen, selecting the right color temperature is as important as the brightness.
The following table breaks down the common Kelvin ranges for a kitchen environment.
Specification | Recommended Range/Type | Best For |
|---|---|---|
Color Temperature | Warm White (2700K–3000K) | Creating a cozy, traditional kitchen feel. |
Neutral White (3000K–3500K) | A versatile choice for most kitchen styles. | |
Cool White (3500K–4000K) | A crisp, clean look for modern or contemporary designs. |
A neutral-to-cool white light (3000K-4000K) is generally preferred for a kitchen because it renders colors accurately and creates an energetic atmosphere conducive to cooking.
Bedroom: Design Ideas for a Relaxing Retreat

The bedroom is a personal sanctuary, a space dedicated to rest and rejuvenation. The lighting design should support this purpose, creating a tranquil atmosphere. A well-planned bedroom recessed lighting layout moves beyond simple overhead fixtures, layering light to build a peaceful environment. These design ideas will help transform any bedroom into a calming escape.
Designing for Relaxation
A successful bedroom recessed lighting layout prioritizes comfort over clinical brightness. The primary goal is to create a soft, inviting ambiance that encourages relaxation at the end of the day. This requires a strategic approach to fixture placement and control.
Avoiding Lights Directly Over the Bed
A common mistake in bedroom lighting is placing recessed fixtures directly over the bed. This placement creates uncomfortable glare and harsh shadows when a person is lying down. A professional recessed lighting layout positions lights around the perimeter of the room or over walkways, not directly above the headboard.
Creating a Soft, Even Glow
To achieve a uniform, gentle illumination, designers space recessed fixtures evenly across the ceiling. A staggered pattern can create a more dynamic and less rigid feel. The key to a versatile bedroom lighting system is the dimmer switch.
Dimmers allow for precise control over brightness, enabling homeowners to set the mood for any activity.
A warm, dim light creates a cozy atmosphere perfect for unwinding.
The ability to adjust lighting in different zones provides ultimate flexibility.
Task Lighting for Practical Needs
A bedroom also requires functional lighting for activities like reading or getting dressed. A layered recessed lighting layout can incorporate focused task lighting without disrupting the room's serene feel.
Using Gimbals as Reading Lights
Adjustable gimbal trims are an excellent solution for task lighting. A single recessed gimbal installed over a reading nook or beside the bed can be aimed precisely at a book. This provides focused light for reading without illuminating the entire bedroom.
Closet and Dressing Area Lighting
Visibility is crucial inside closets and near dressing areas. For these zones, recessed lighting ensures the entire space is well-lit. While the main bedroom benefits from warm light, designers often suggest a slightly cooler light for closets.
Color Accuracy Tip: A neutral white light (around 4000K) inside a closet helps render clothing colors accurately. This ensures you can distinguish between black and navy blue items with ease.
Bedroom Light Recommendations
Choosing the right technical specifications is the final step in creating the perfect bedroom recessed lighting. The brightness and color temperature of the light are critical for establishing a restful mood.
Recommended Lumens: 1,500-3,000
A total lumen output between 1,500 and 3,000 provides sufficient ambient light for a typical bedroom. This range is bright enough for general activities but not overpowering. Dimmers are essential to adjust this brightness level down for relaxation.
Recommended Kelvin: 2700K-3000K
For a bedroom, a warm white color temperature is the ideal choice. This range mimics the cozy glow of an incandescent bulb and promotes feelings of comfort and calm. A light between 2700K and 3000K helps signal to the brain that it is time to wind down.
Bathroom: Safe and Effective Lighting Design
A bathroom requires a lighting plan that balances safety, function, and ambiance. An effective bathroom recessed lighting layout provides bright, clear light for grooming tasks while ensuring all fixtures are safe for a high-moisture environment. These design ideas focus on creating a layered and practical bathroom lighting scheme.
Vanity Lighting Essentials
The vanity is the primary task area in any bathroom. The lighting here must be flattering and shadow-free for activities like shaving or applying makeup. A thoughtful recessed lighting layout is crucial for this zone.
Sidelights vs. Overhead Downlights
Designers choose vanity lighting based on the desired aesthetic and primary function. While overhead recessed lighting offers a clean look, vertical sconces often provide more even facial illumination. The best choice depends on the bathroom's specific needs.
Overhead Recessed Lights | Vertical Sconces | |
|---|---|---|
Best for | General grooming, quick routines | Makeup application, shaving, even face lighting |
Aesthetics | Clean and simple lines | Creates a custom, decorative look |
Trade-offs | Can create more facial shadows | Requires more wall space and wiring planning |
Eliminating Facial Shadows
The key to good vanity lighting is eliminating shadows. A single recessed fixture directly overhead will cast shadows under the eyes, nose, and chin. To prevent this, a bathroom recessed lighting layout should place two small recessed fixtures on either side of the mirror, about 30-36 inches apart, to provide cross-illumination.
Lighting the Shower and Tub
Safety is the top priority when planning lighting for wet areas like showers and tubs. The fixtures used in these zones must be specifically rated for direct or indirect water exposure.
Using Wet-Rated or Damp-Rated Fixtures
Fixtures in a bathroom carry specific UL ratings to indicate their suitability for moist environments. Understanding the difference is essential for a safe recessed lighting layout.
Damp-Rated Fixtures: These are suitable for general bathroom areas with humidity but cannot handle direct water contact.
Wet-Rated Fixtures: These are fully sealed and required for installation inside a shower or directly over a tub where they will be exposed to water spray.
Safety Alert ⚠️: Never install a damp-rated fixture inside a shower enclosure. Always use a wet-rated recessed fixture for any location with direct water exposure to prevent electrical hazards.
Placement for Safety and Ambiance
A single wet-rated recessed light placed in the center of the shower ceiling provides excellent functional lighting. For a spa-like feel, designers may place the fixture closer to the wall with the showerhead. This placement highlights the water stream and tile work, creating a more ambient light.
Bathroom Light Recommendations
The technical specifications of your recessed lighting will define the bathroom's atmosphere and functionality. A bright, clean light is typically best for this task-oriented space.
Recommended Lumens: 4,000-8,000
A bathroom needs bright, effective lighting. A total output between 4,000 and 8,000 lumens ensures the entire space is well-lit for safety and grooming. This higher lumen count is a key part of any functional bathroom layout. Dimmers allow for brightness adjustments, creating a softer mood when desired.
Recommended Kelvin: 3000K-4000K
A neutral white color temperature (3000K-4000K) is ideal for a bathroom. This range mimics natural daylight, which is excellent for tasks like makeup application. It provides a clean, energetic feel without being too stark or clinical. For the most accurate color rendering, designers also recommend recessed fixtures with a high Color Rendering Index (CRI) of 90 or above.
Hallway and Entryway Lighting Ideas
Hallways and entryways create the first impression of a home. An effective recessed lighting layout in these transitional spaces ensures safety, sets a welcoming tone, and guides visitors. These design ideas focus on transforming narrow passages into bright, inviting paths. A thoughtful lighting plan can make a significant impact.
Creating a Welcoming Path
The primary function of hallway lighting is to provide a safe and clear path. A strategic recessed lighting layout achieves this with clean, unobtrusive fixtures that deliver even illumination from one end to the other.
Linear Spacing Rules
For long, narrow hallways, a single line of recessed fixtures is the most effective layout. This approach provides consistent light and avoids a cluttered ceiling. Designers follow specific guidelines for this linear arrangement.
Run the recessed lights in a single line down the length of the space.
Space the fixtures approximately 5 to 6 feet apart to ensure uniform illumination.
Positioning the lights slightly closer to the walls can help prevent dim spots.
Using Light to Guide the Way
A well-executed recessed lighting layout does more than just illuminate; it guides movement. The placement of each light source creates a visual rhythm that naturally draws people through the space. This technique is especially useful in entryways, where the lighting can direct guests from the front door into the main living areas.
Highlighting Architectural Details
Beyond general illumination, recessed lighting can add character to a hallway. An adaptable recessed lighting layout allows for accenting artwork or architectural features, turning a simple corridor into a personal gallery.
Accent Lighting for Art Niches
Adjustable gimbal trims are perfect for highlighting art niches or framed pictures along a hallway wall. A focused beam of light can turn a piece of art into a dramatic focal point. This targeted lighting adds depth and personality to the space.
Wall-Washing Techniques
Wall-washing is a powerful technique for narrow hallways. This method involves aiming recessed fixtures at a wall to create a broad, uniform sheet of light.
This technique can make a hallway feel wider and less like a tunnel.
It visually expands the walls, making the confined area appear more spacious.
Using small, 3-inch recessed fixtures can transform a dark passage into a bright, inviting gallery.
Hallway Light Recommendations
Selecting the correct specifications ensures your hallway is both welcoming and functional. The right brightness and color temperature are essential for this transitional space.
Recommended Lumens: 1,000-2,000
A total lumen output between 1,000 and 2,000 is typically sufficient for most hallways. This range provides enough light for safe passage without being overwhelming. For a 100-square-foot hallway, this equates to 10-20 lumens per square foot.
Recommended Kelvin: 2700K-3000K
A warm white color temperature (2700K-3000K) is ideal for creating a comforting and relaxed environment. This inviting glow makes guests feel welcome the moment they step inside. It connects seamlessly with the warm lighting often used in adjacent living rooms and bedrooms.
A successful recessed lighting layout balances ambient, task, and accent light. Homeowners can transform your home by planning their lighting layout on paper first. This 10-step checklist for planning your recessed lighting layout helps avoid common mistakes.
The "Airport Runway" Effect: A rigid grid of recessed lighting makes a home feel like a dentist's office.
Creating "Wall Scallops": Placing lights too close to walls highlights imperfections.
Forgetting Dimmers: Dimmers offer ultimate flexibility for any recessed lighting layout.
One-Size-Fits-All Layout: The best recessed lighting layout considers the layout ideas for each room type.
Ignoring Color Temperature: The right light color sets the mood.
This 10-step checklist for planning your recessed lighting layout is the key to understanding how to layout recessed lighting.
FAQ
Can designers mix recessed lights with other fixtures?
Yes. A layered lighting plan is ideal. Designers often combine recessed lights with pendants or chandeliers. This approach provides both functional ambient light and a decorative focal point. A living room benefits greatly from this strategy.
Are recessed lights suitable for sloped ceilings?
Absolutely. Designers use gimbal (adjustable) trims or special sloped-ceiling housings. These fixtures direct the light straight down, preventing awkward angles. This ensures proper illumination in a living room with vaulted ceilings.
What is the best recessed light size for a home?
The choice depends on ceiling height and purpose.
4-inch fixtures offer a modern, versatile look for most rooms.
6-inch fixtures provide broader light coverage, suitable for general ambient lighting.
3-inch fixtures are great for accenting and task lighting.
Why is the Color Rendering Index (CRI) important?
CRI measures how accurately a light source shows true colors. A high CRI (90+) is crucial in a kitchen or bathroom. It ensures food looks appetizing and makeup colors appear accurate. A living room also benefits from good color rendering.
How many recessed lights does a bathroom need?
The number varies with size. A small bathroom may only need two or three fixtures. A larger bathroom could require five or more. The goal is to eliminate shadows, especially around the vanity and in the shower area of the bathroom.
Should every room have dimmers?
Dimmers are highly recommended for ultimate flexibility. They allow brightness adjustments for any activity. A living room needs dimmers for movie nights. A bathroom benefits from dimmed light for a relaxing bath. The living room requires this control.
What is the best layout for a living room with a TV?
Designers avoid placing lights that cause screen glare. A good layout positions fixtures away from the direct line of sight to the television. This enhances the viewing experience in the living room.
See Also
Top LED Recessed Lighting Solutions for Kitchens and Bathrooms
Exploring the Advantages of LED Recessed Ceiling Lighting Fixtures
Essential Features for Contemporary Recessed LED Downlight Installations
The Ultimate Beginner's Guide to LED Recessed Ceiling Lighting